How to Setup your TV Transmission Device
A TV Transmission Device allows users to integrate Live Television or other Digital Media along with their NexSigns Digital Signage.
Topics Covered
Printable Setup Instructions
Here are the TV Transmission Setup Instructions - V4
Setup Instructions
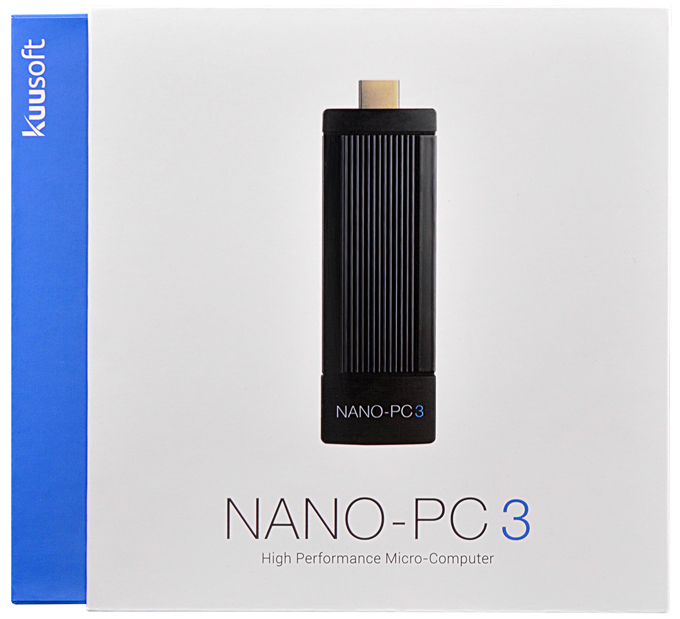
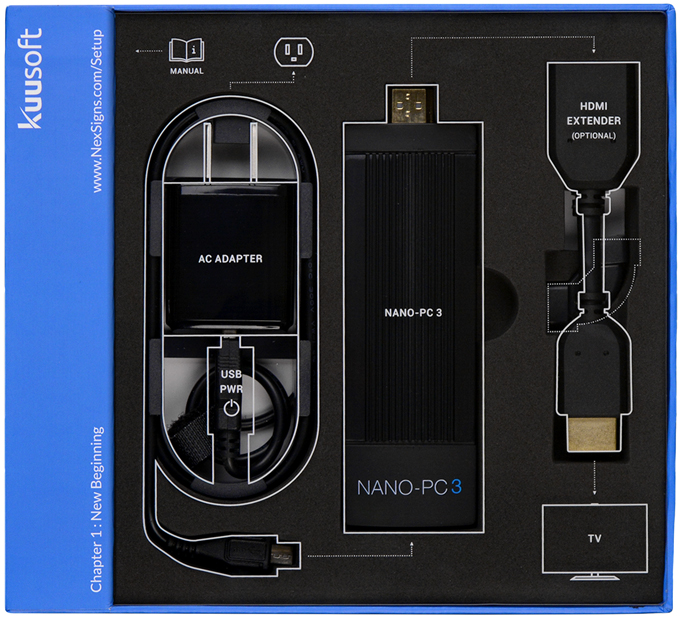
Nano-PC3 Retail Box - Parts Included
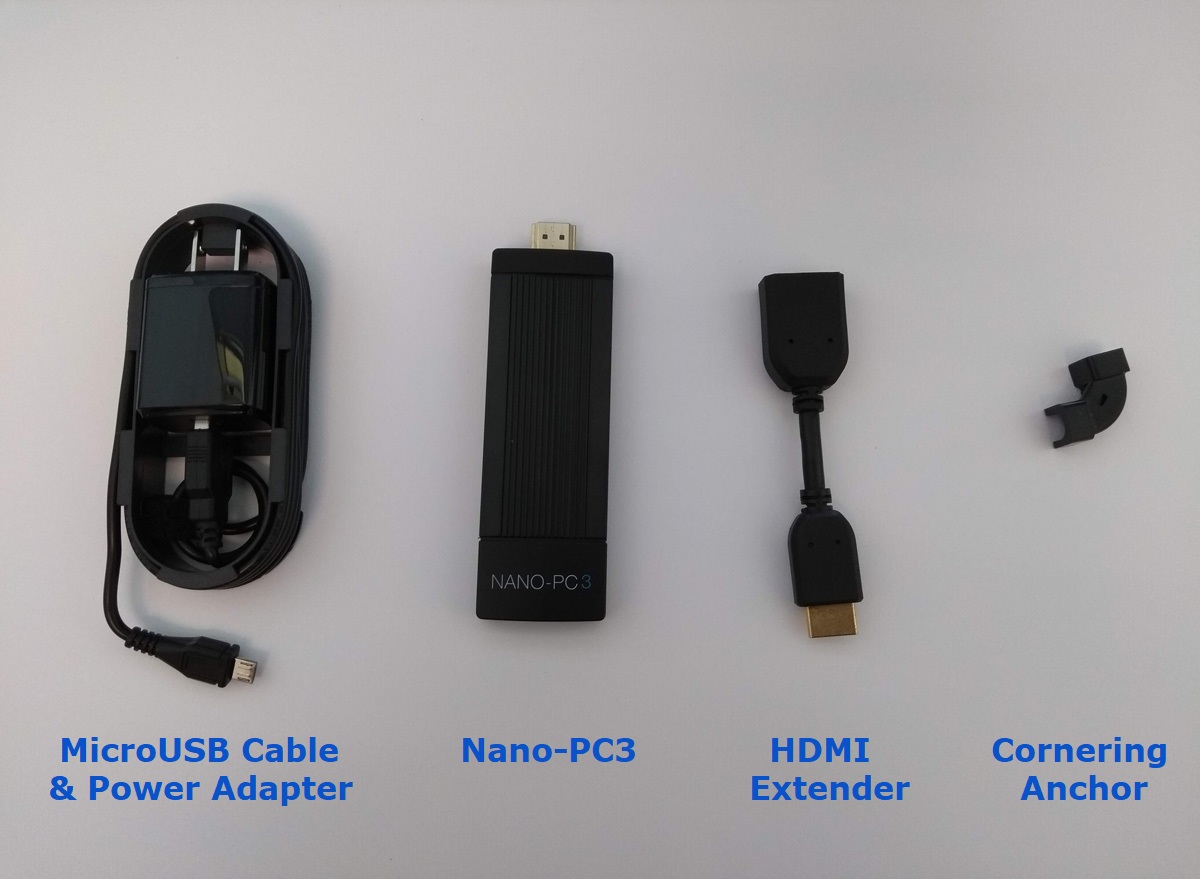
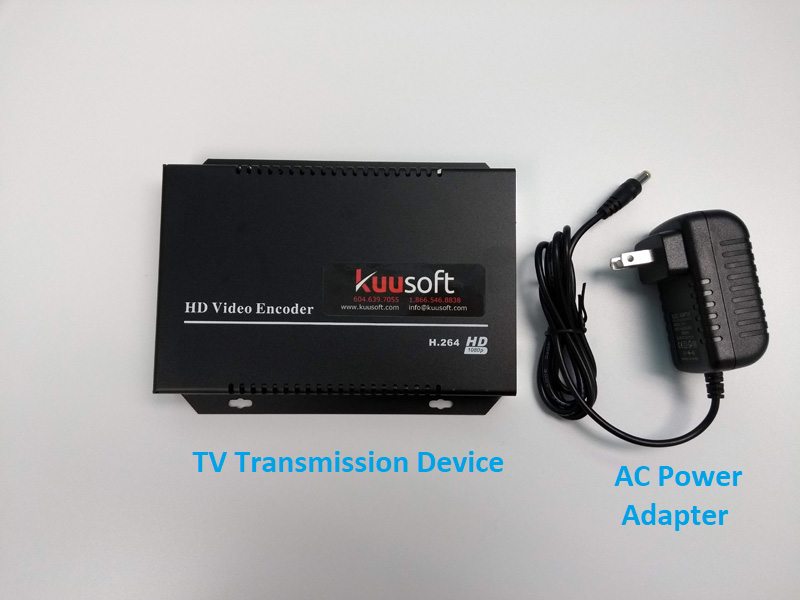
TV Transmission Device - Parts Included
Setup the TV Transmission Device V2
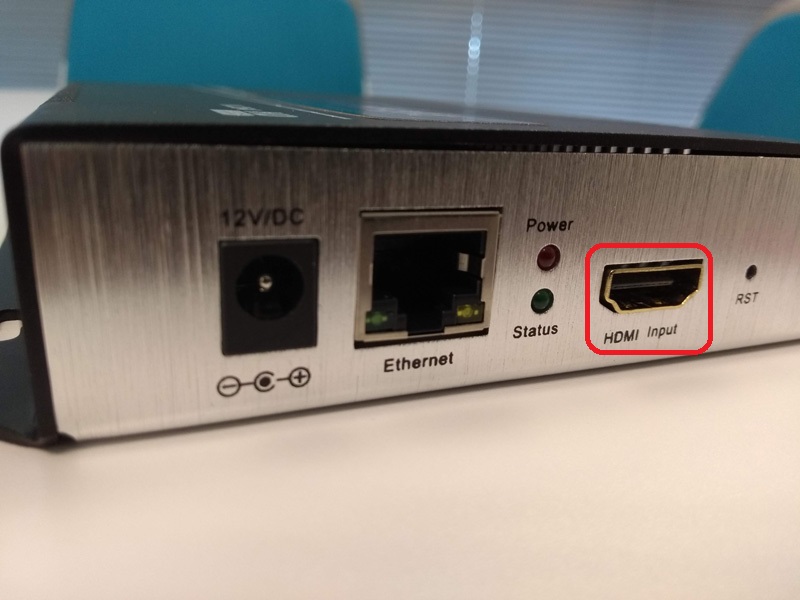
- Connect the HDMI cable into the HDMI Input port on the TV Transmission Device
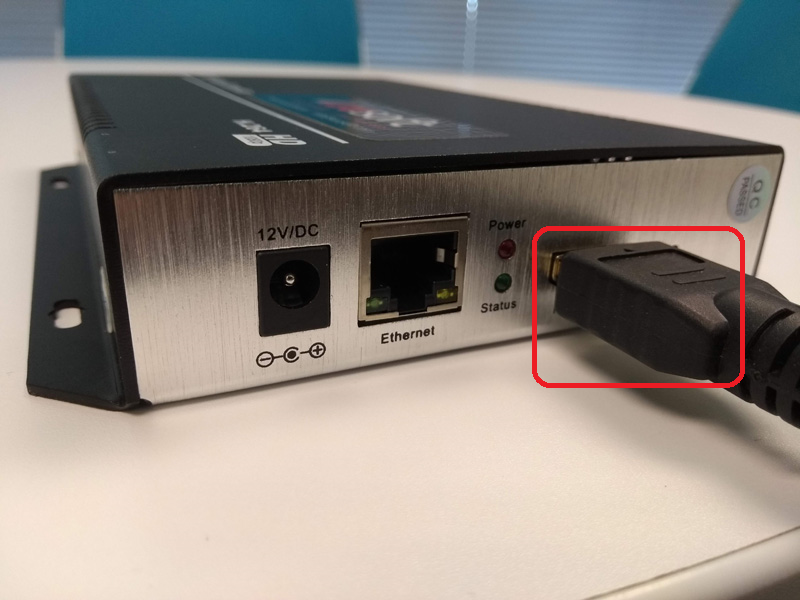
- Plug in the other end of the HDMI cable into your HDTV source
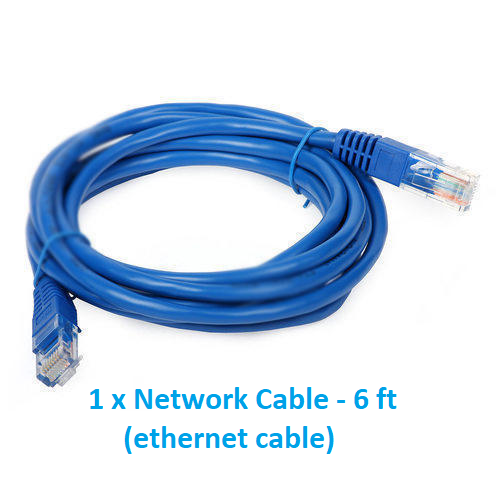
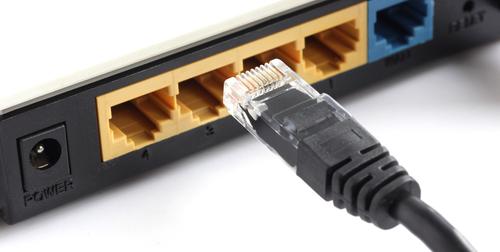
- Connect a Network Cable into the Ethernet port on the TV Transmission device
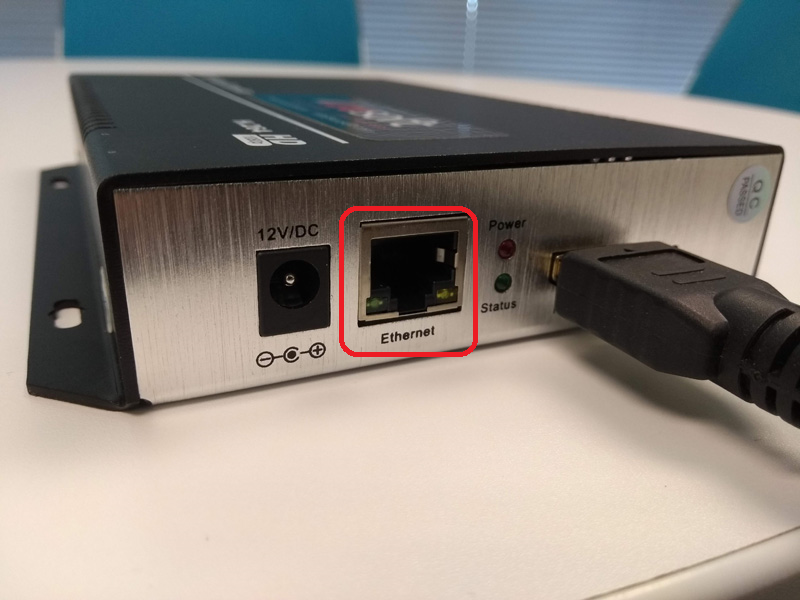
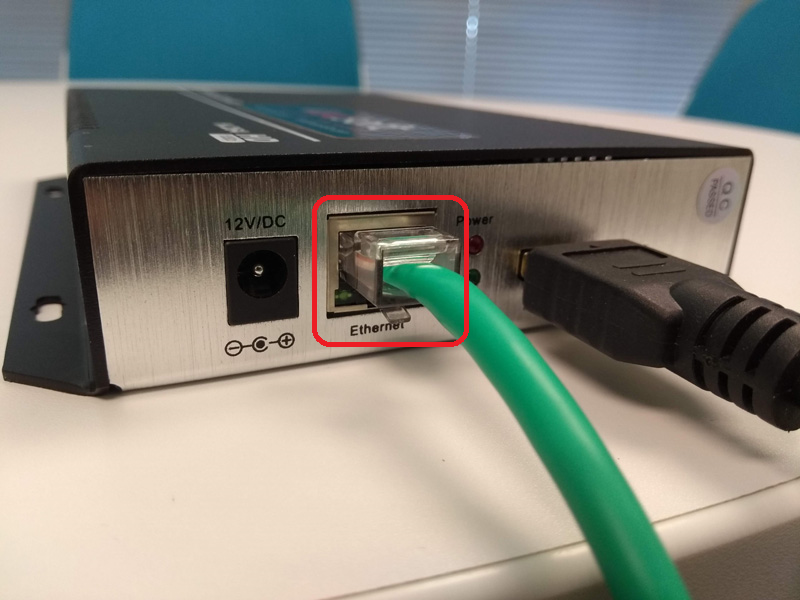
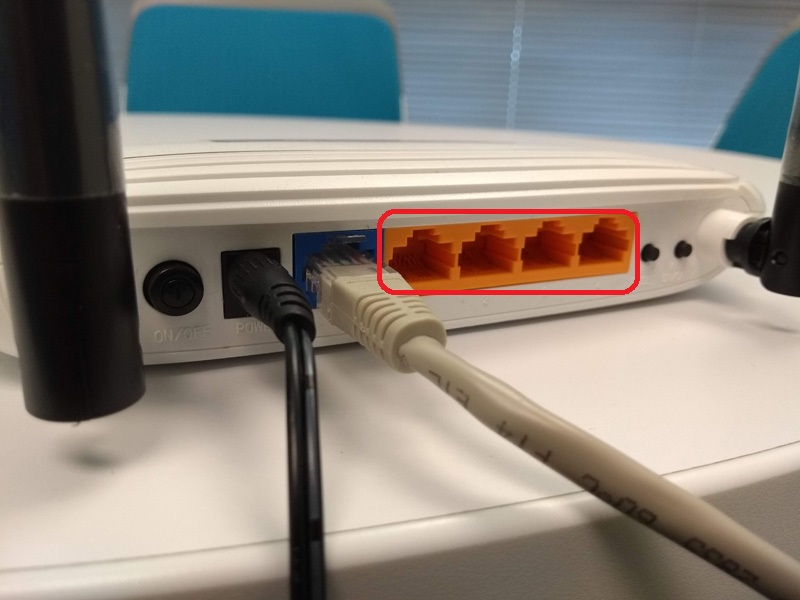
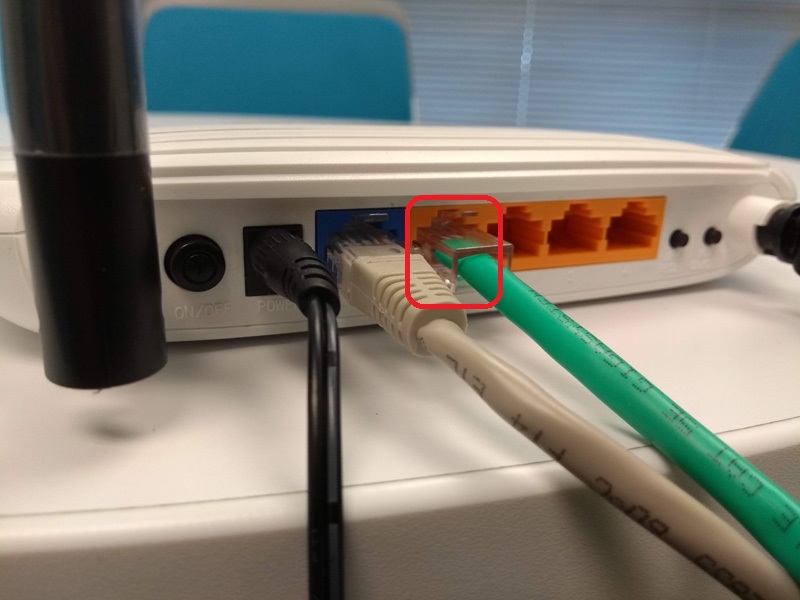
- Plug in the other end of the Network Cable into the Existing Router in a Network Port labeled 1, 2, 3, or 4
- Connect the AC Power Adapter into the 12V/DC port on the TV Transmission device
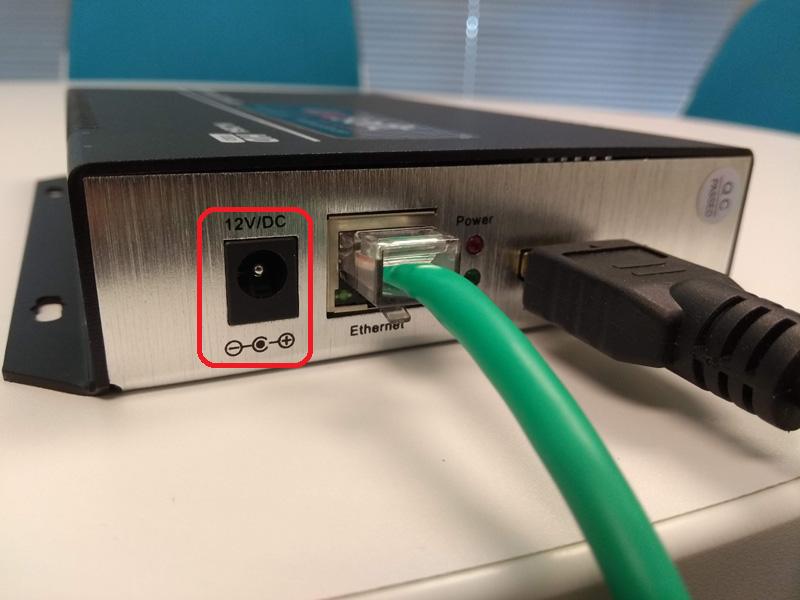
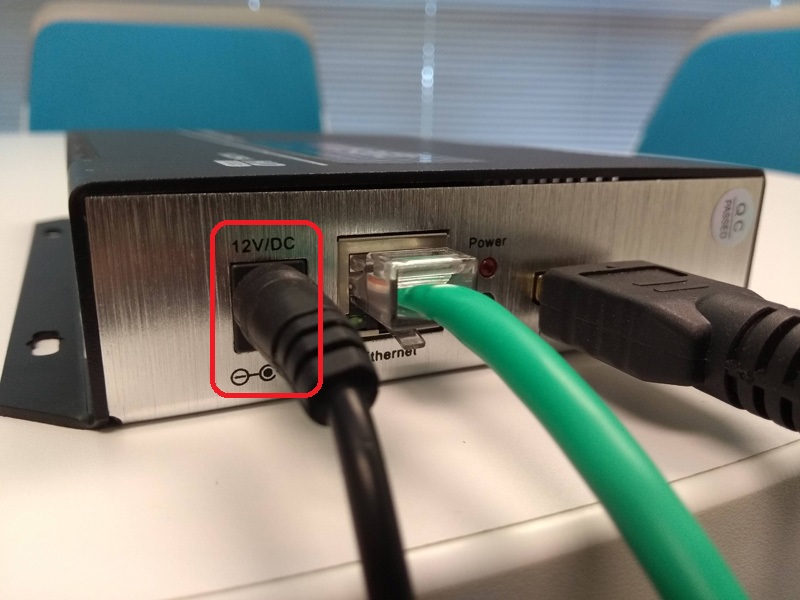
- Plug the other end of the AC Power Adapter into an Electrical Outlet (or Surge Protector)
Setup the Nano-PC Device
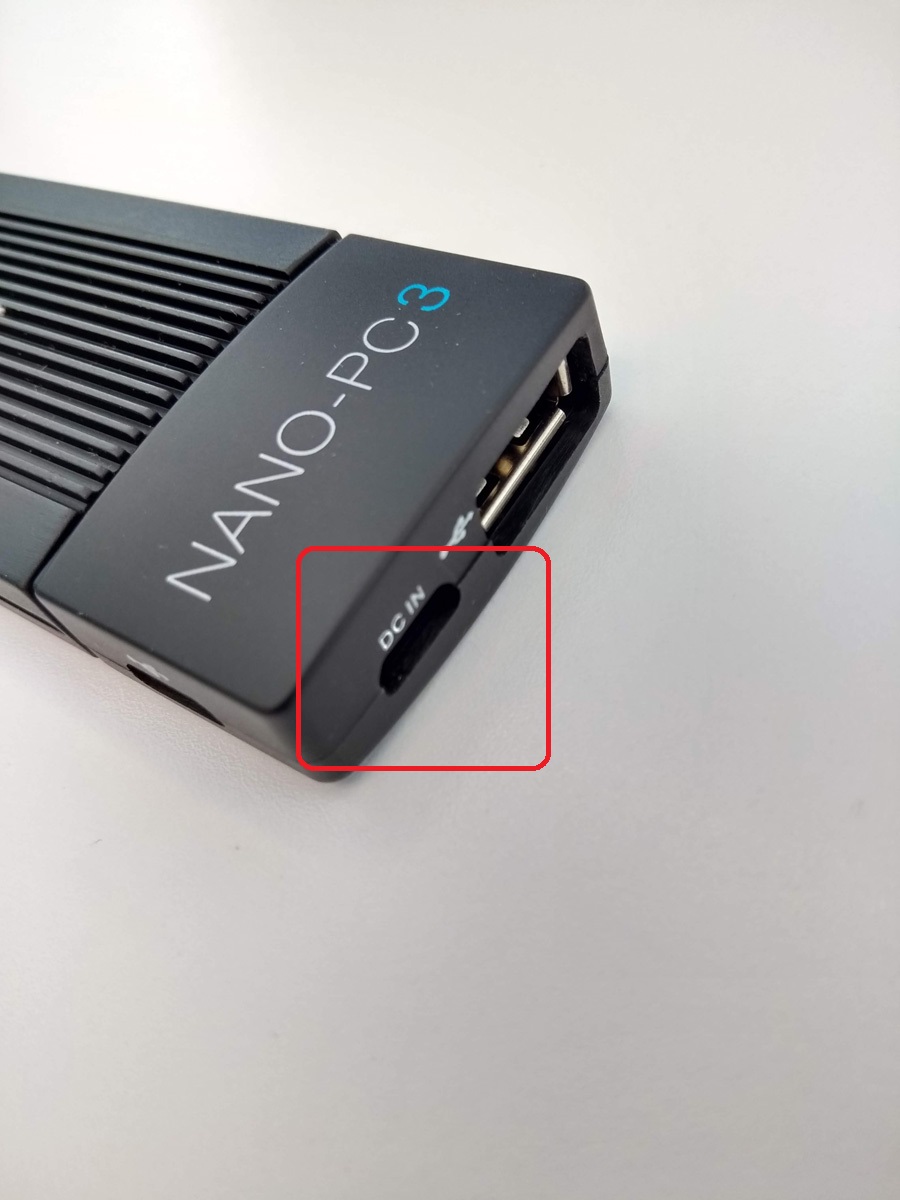
- Plug in the MicroUSB cable into the DC IN port at the bottom of your Nano-PC3

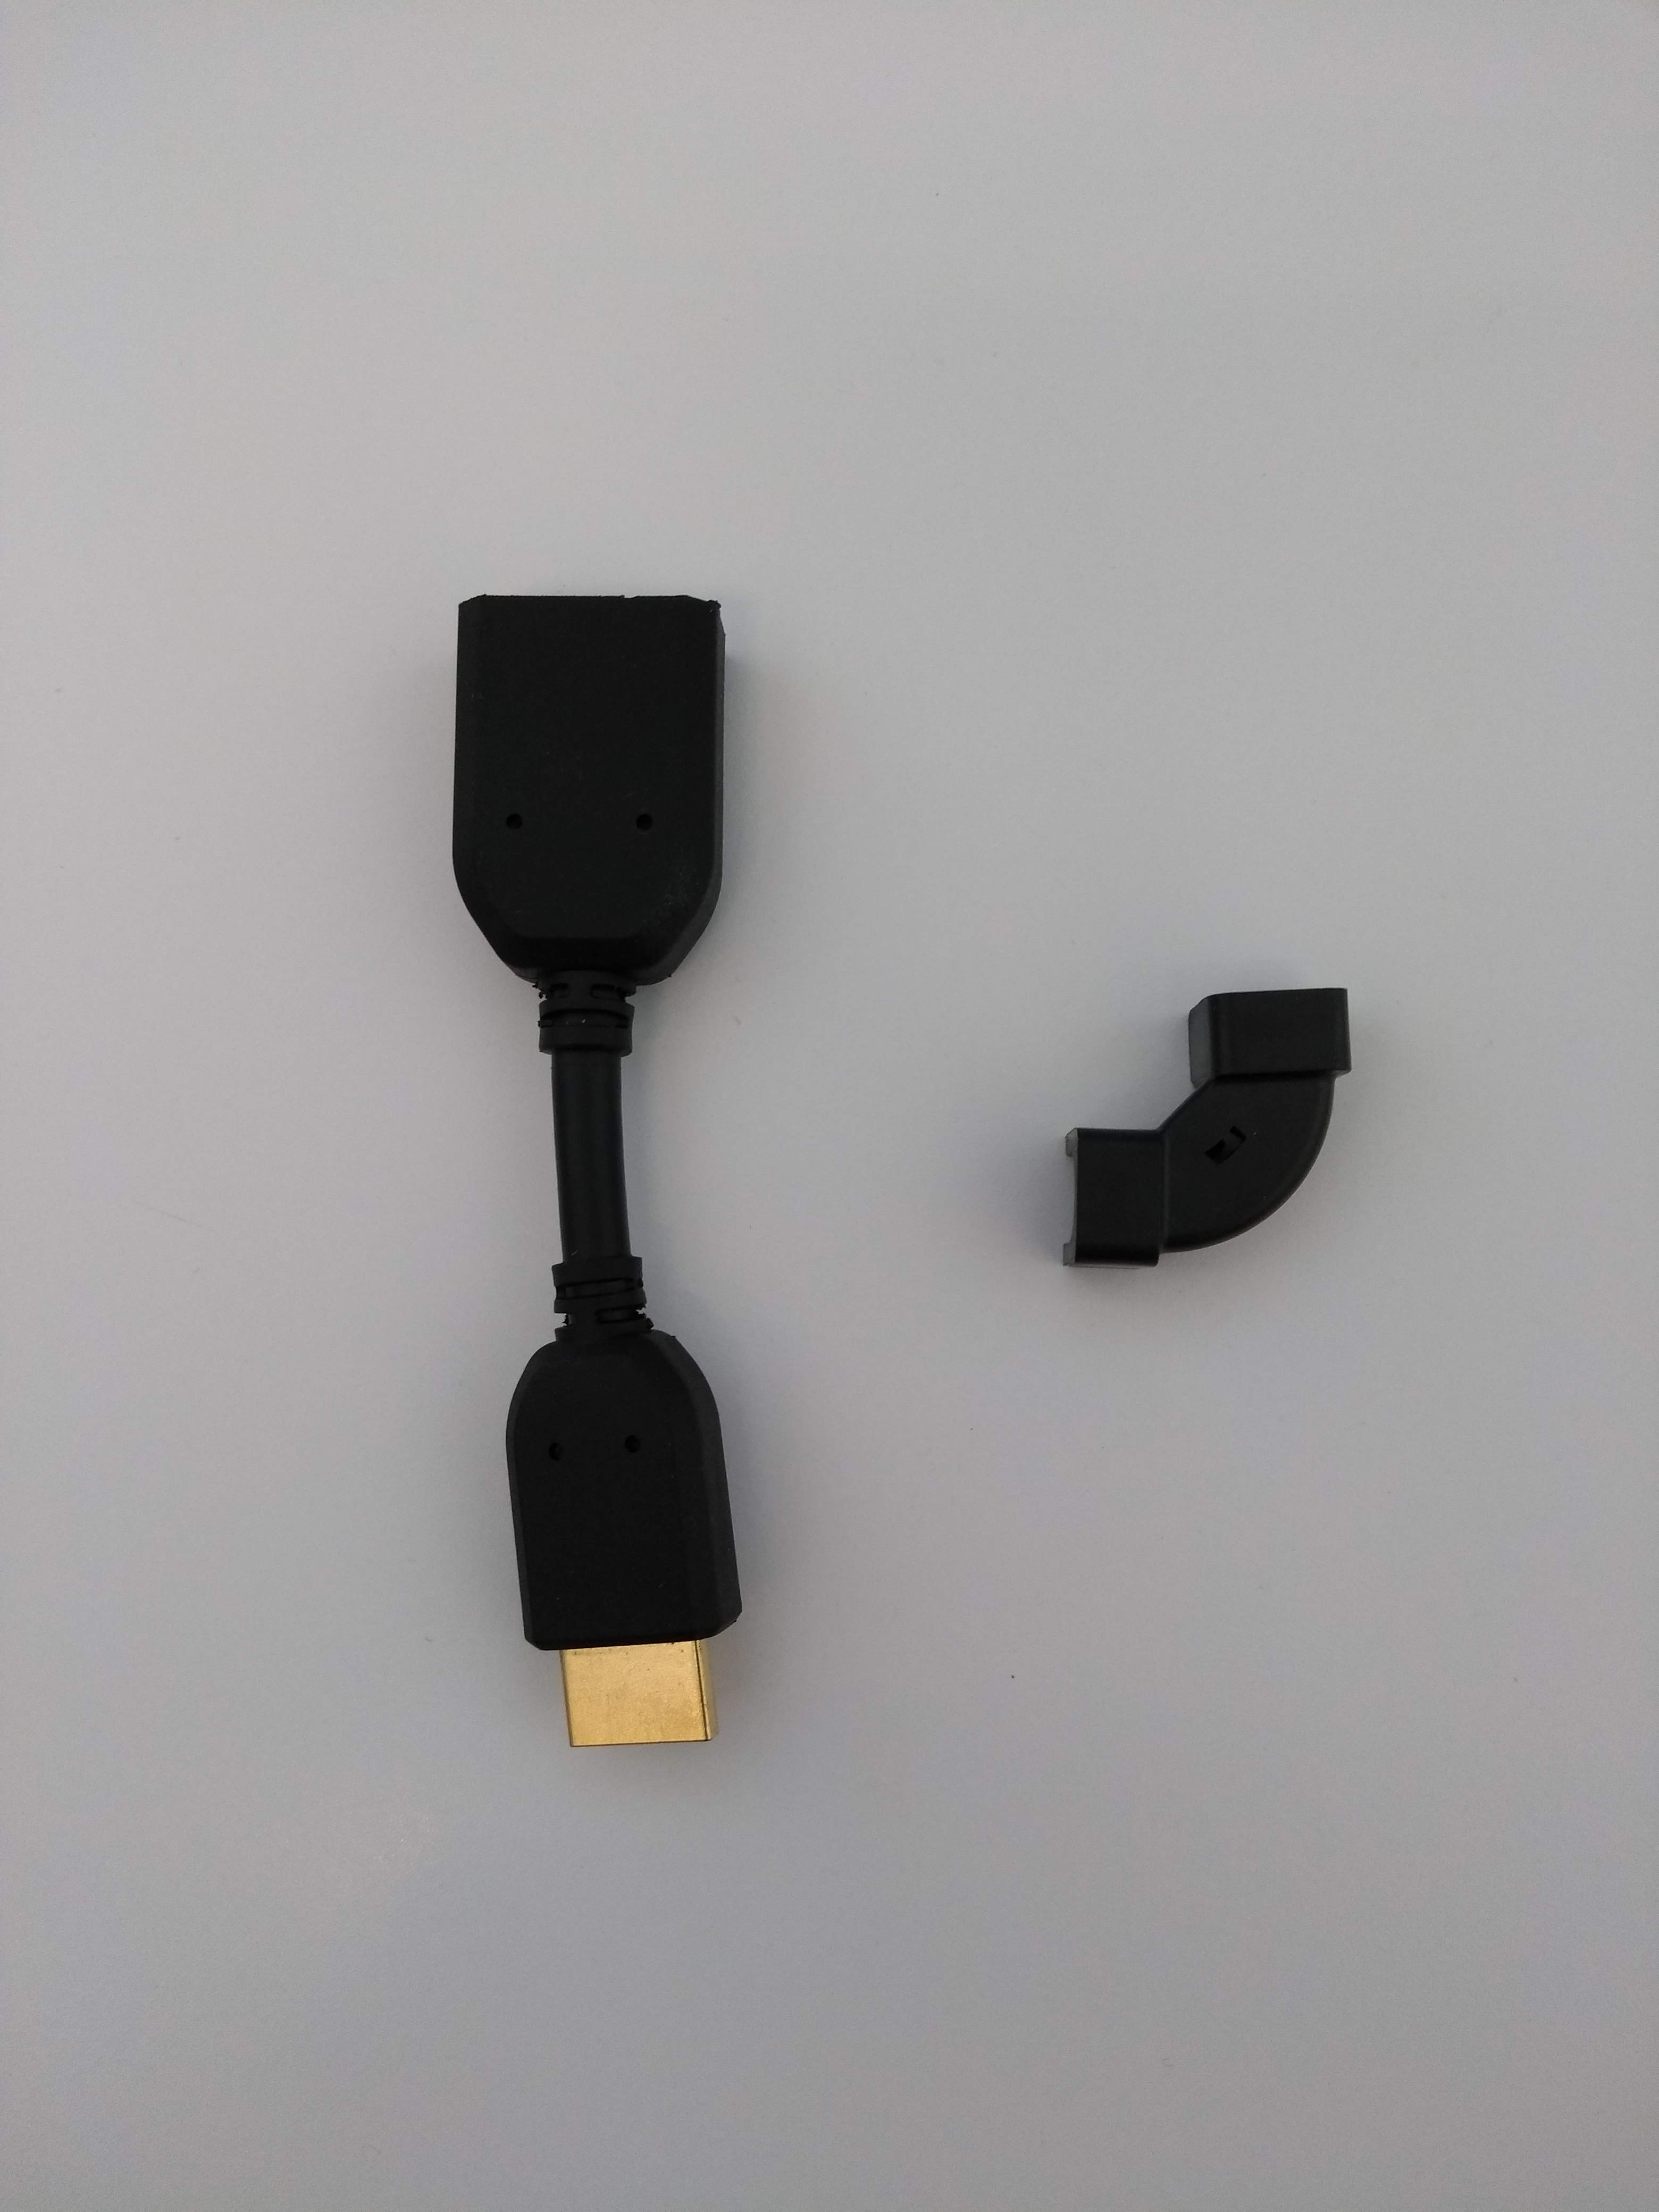
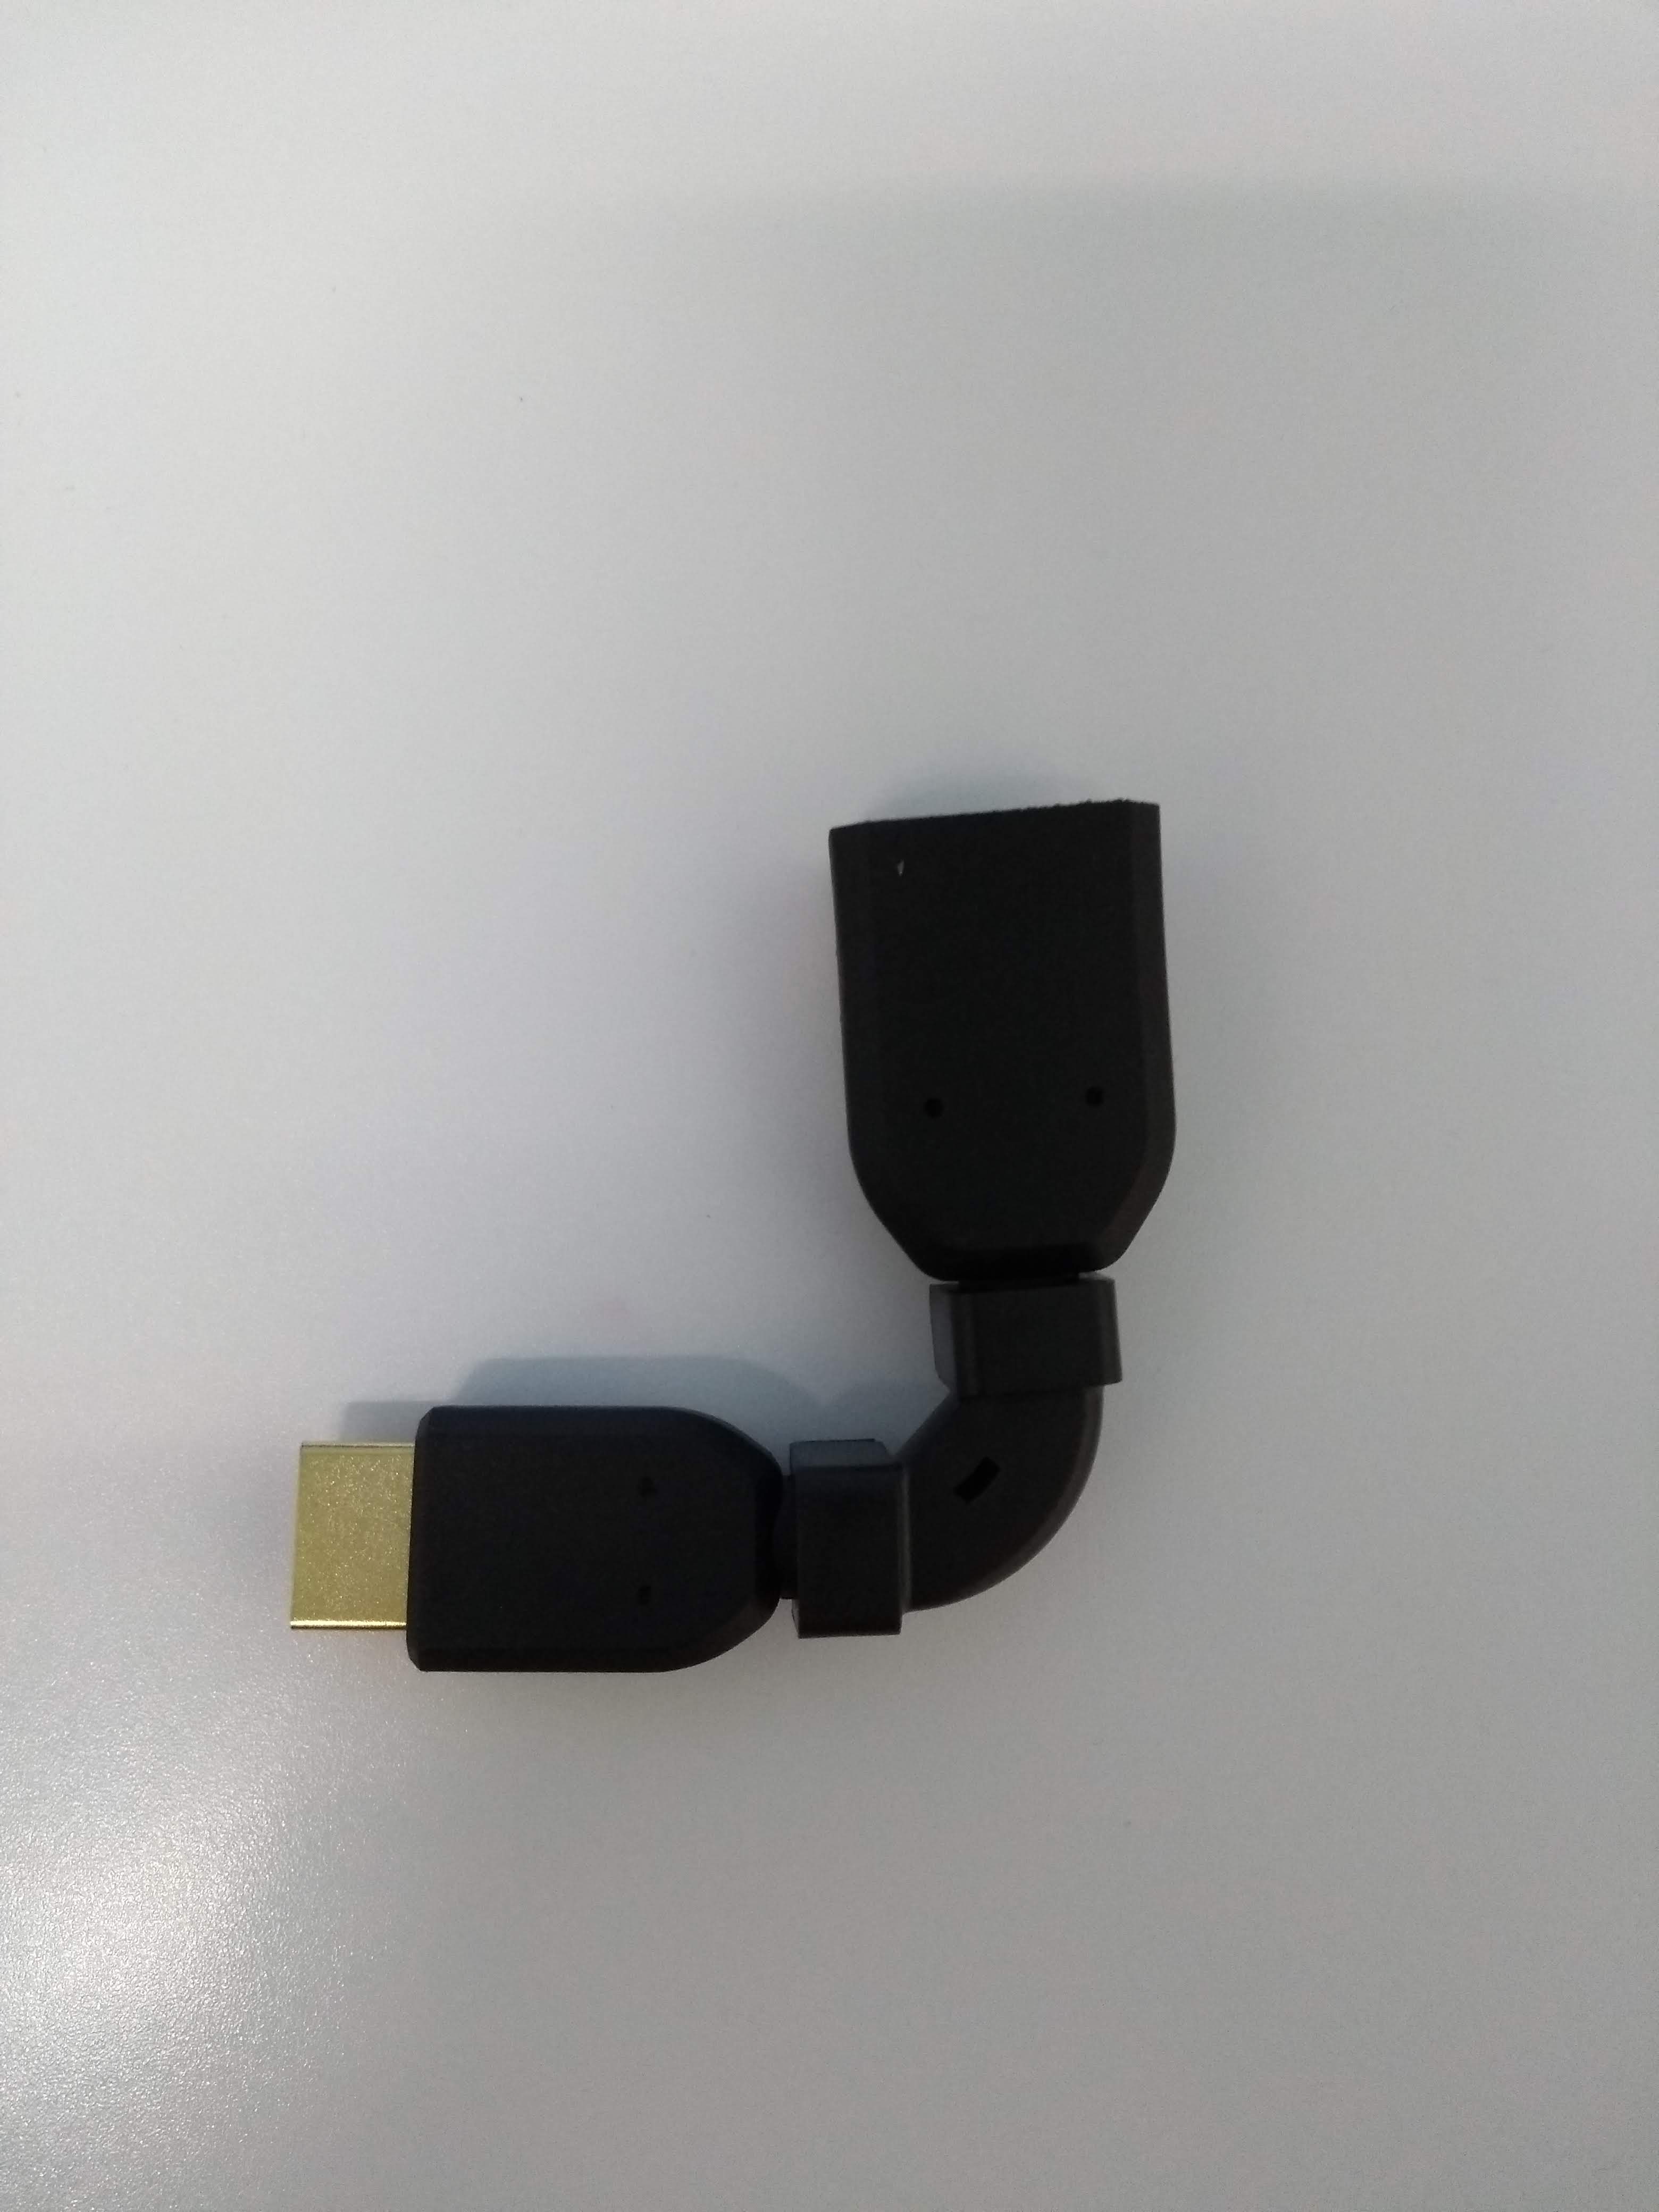
Use the HDMI Extender and Cornering Anchor (optional but recommended)
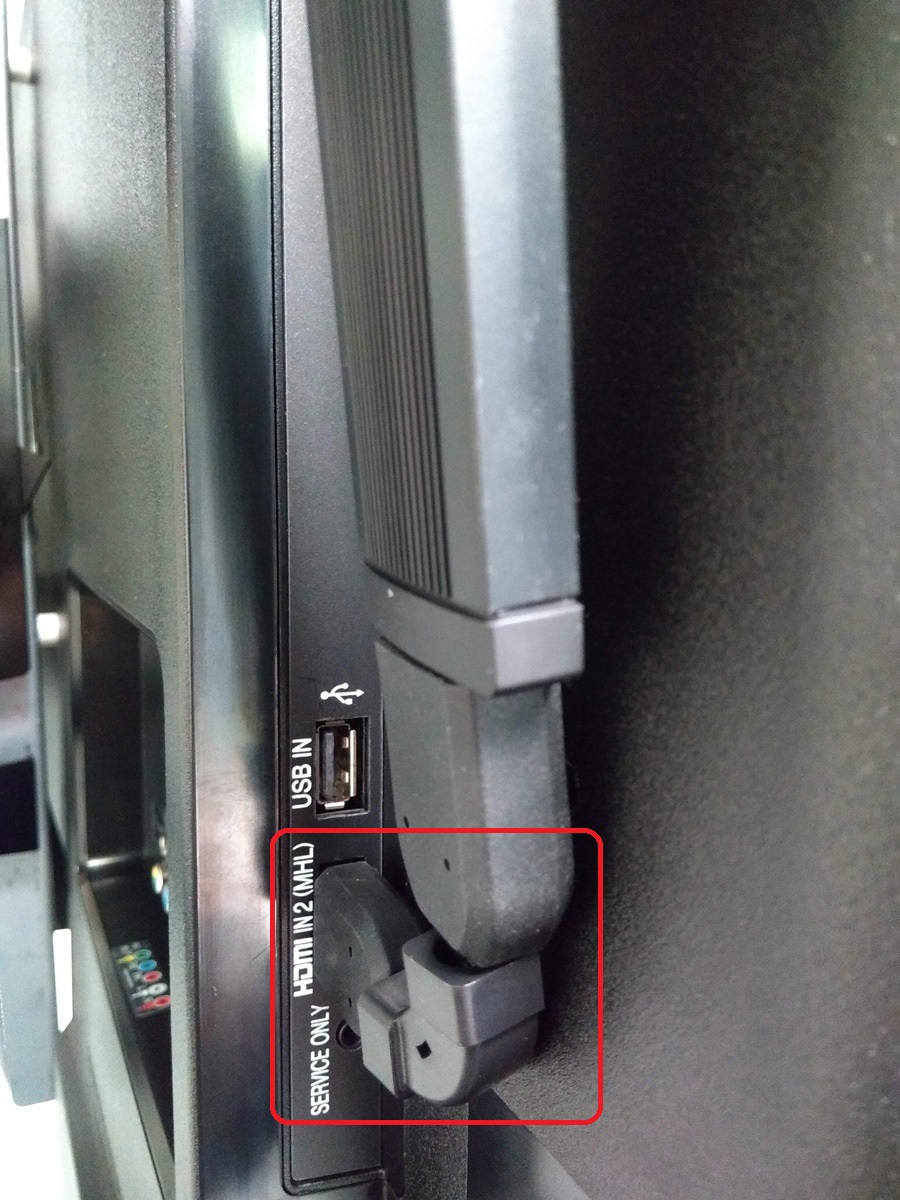
The HDMI Extender and Cornering Anchor is useful to hide the Nano-PC behind the TV, prevents the Nano-PC from blocking the TV USB port, and helps with cable management.- Bend the HDMI Extender to the desired angle and apply the Cornering Anchor to secure it in place
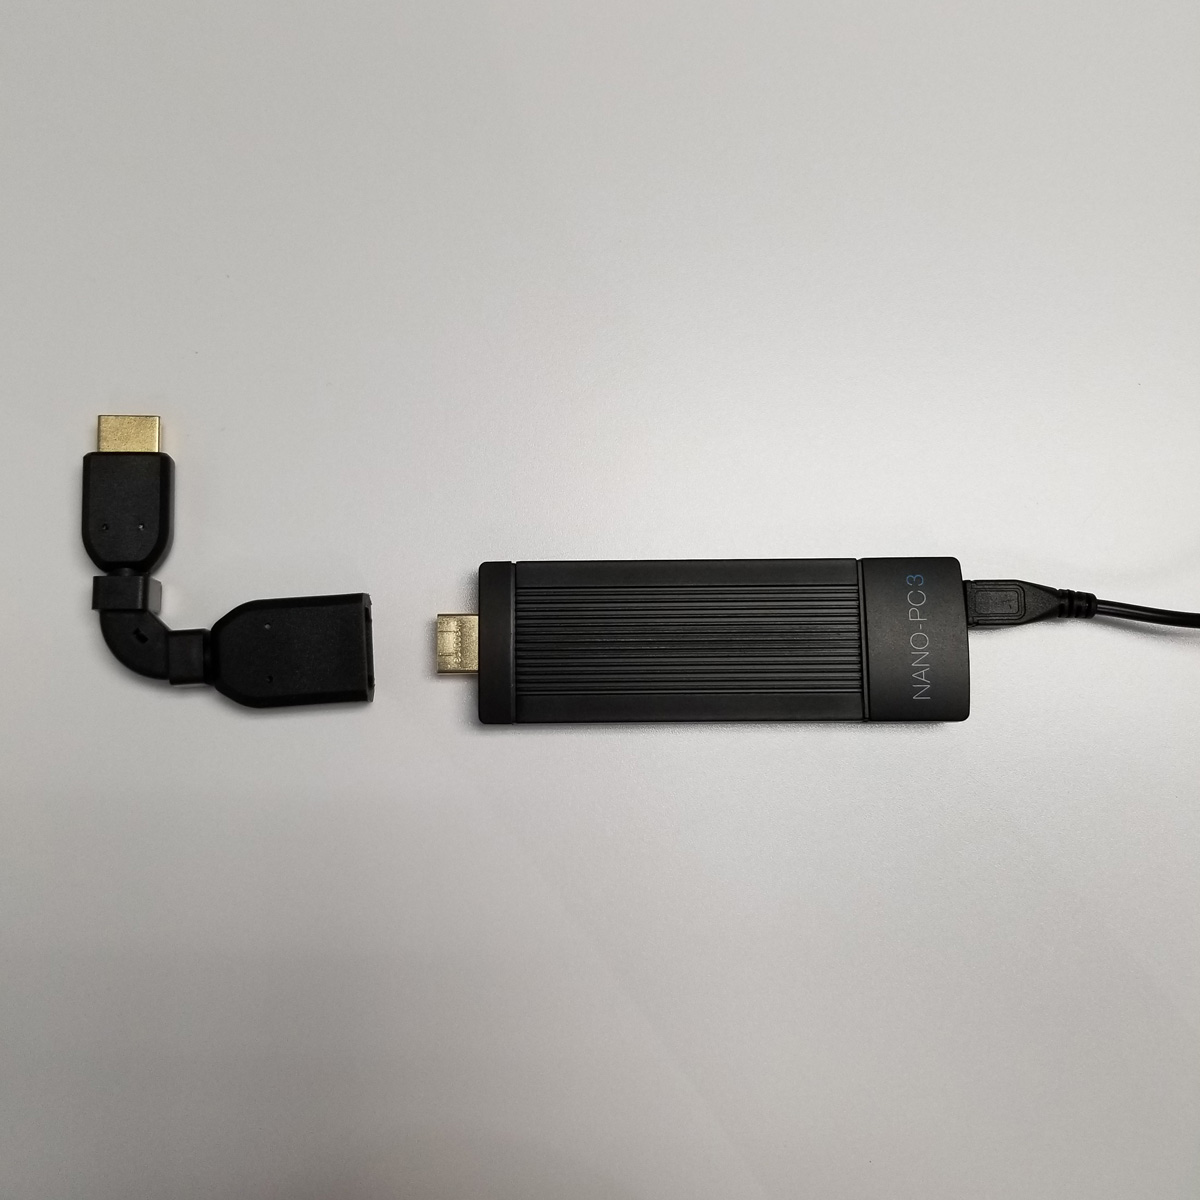
- Plug in the Nano-PC into the HDMI Extender

- Bend the HDMI Extender to the desired angle and apply the Cornering Anchor to secure it in place
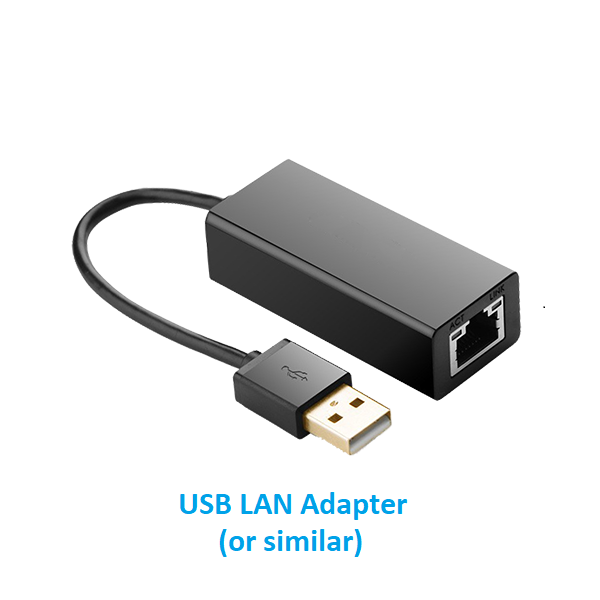
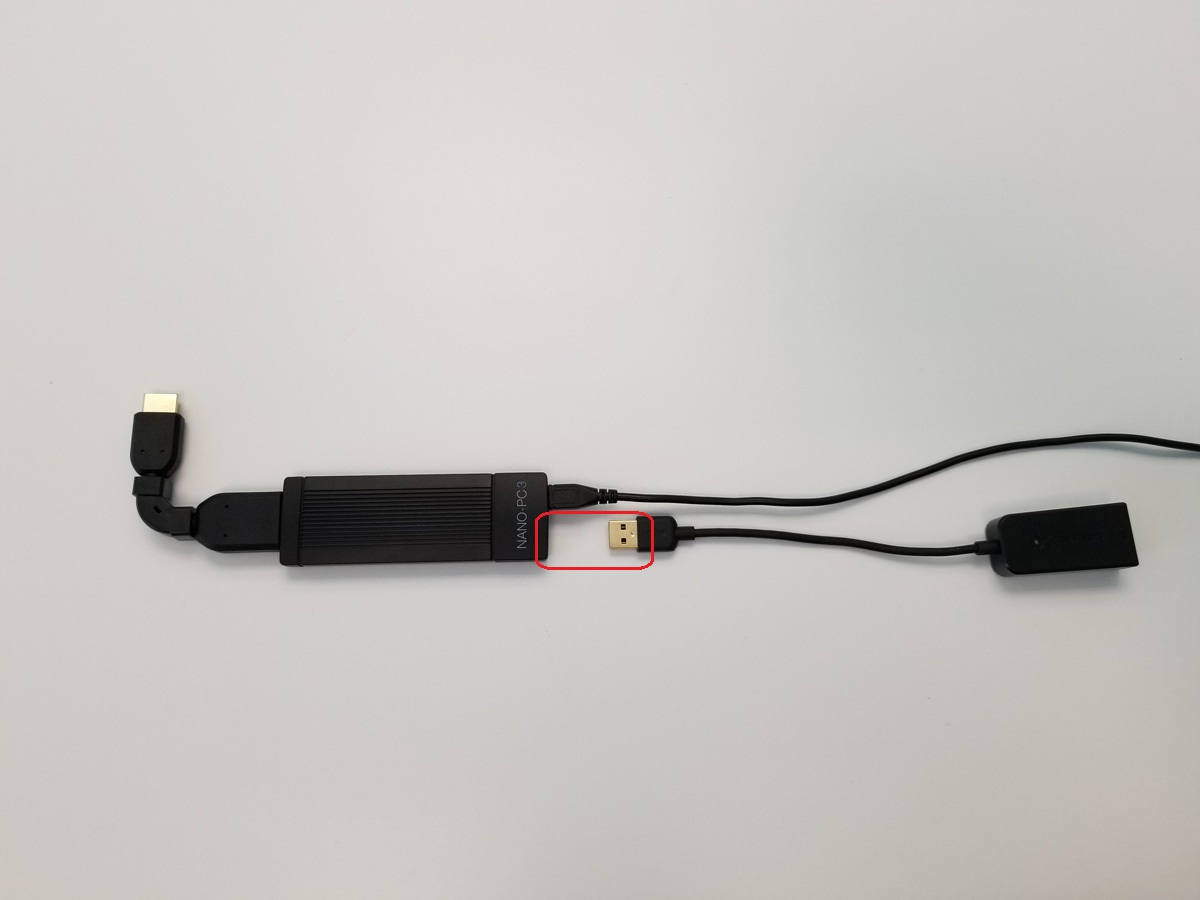
- Plug in the USB LAN Adapter into the Nano-PC

- Plug in one end of the Network Cable (Not Included) into the USB LAN Adapter
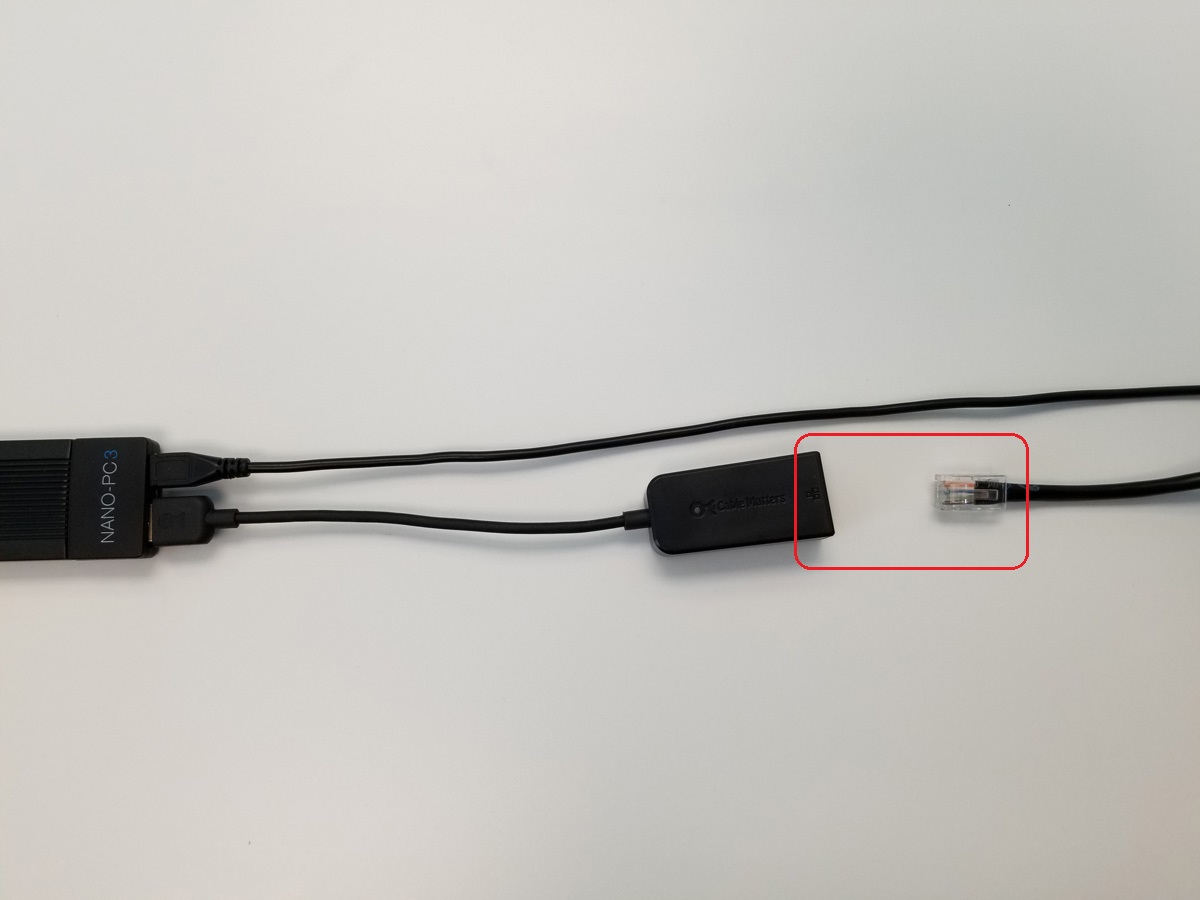
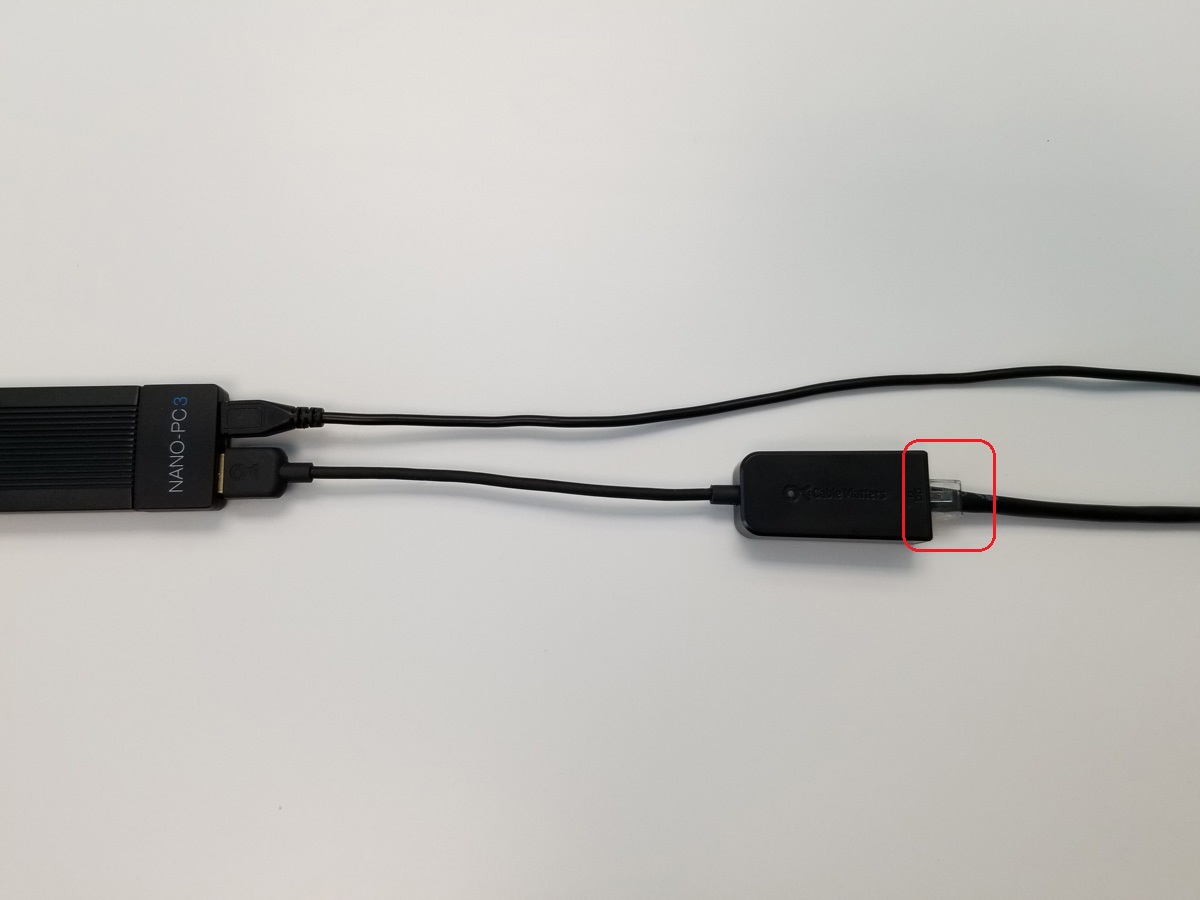
- Plug in the other end of the Network Cable (Not Included) into a network port on the Existing Router in a Network Port labeled 1, 2, 3, or 4
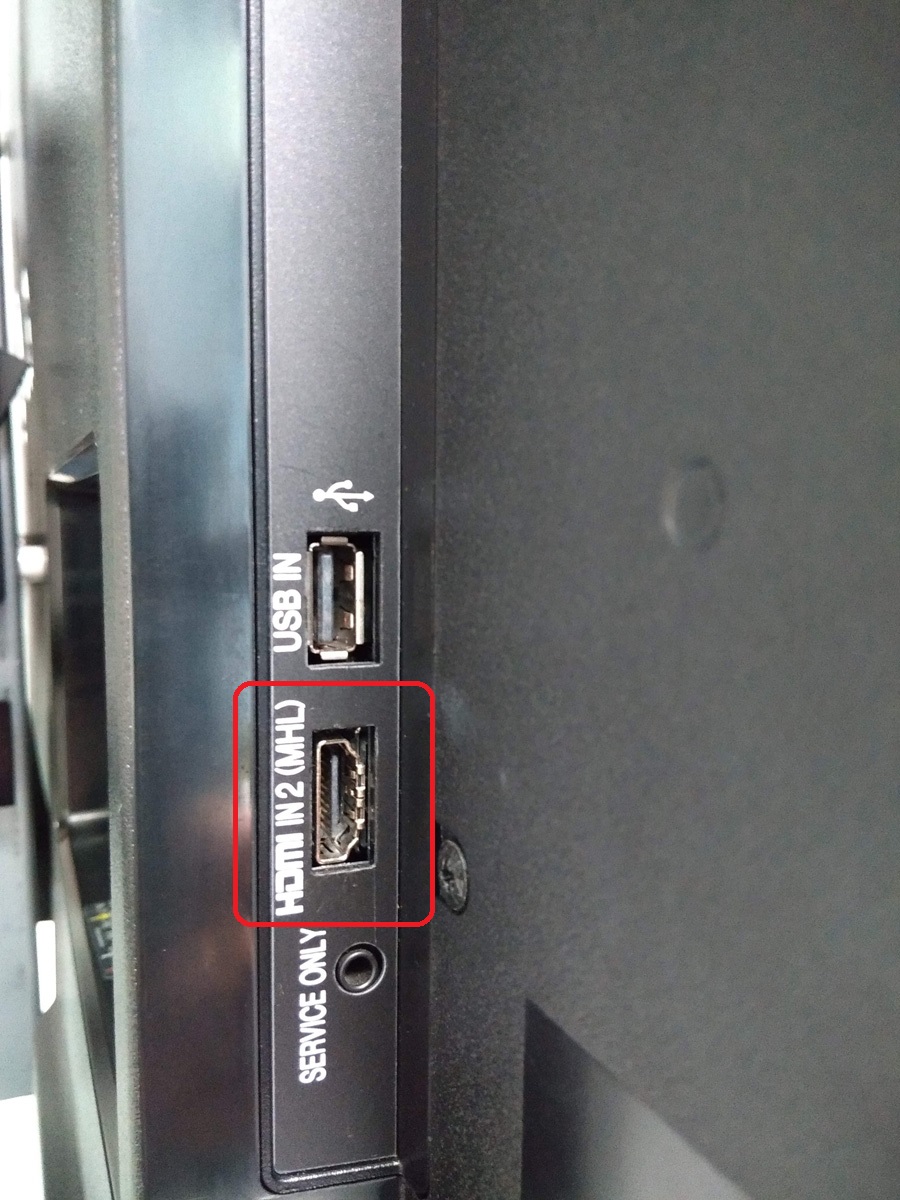
- Plug in the HDMI Extender (with the Nano-PC attached) into your TV's HDMI port (location of the HDMI port may vary depending on the TV model)
- Power the Nano-PC Device (complete EITHER of the following)
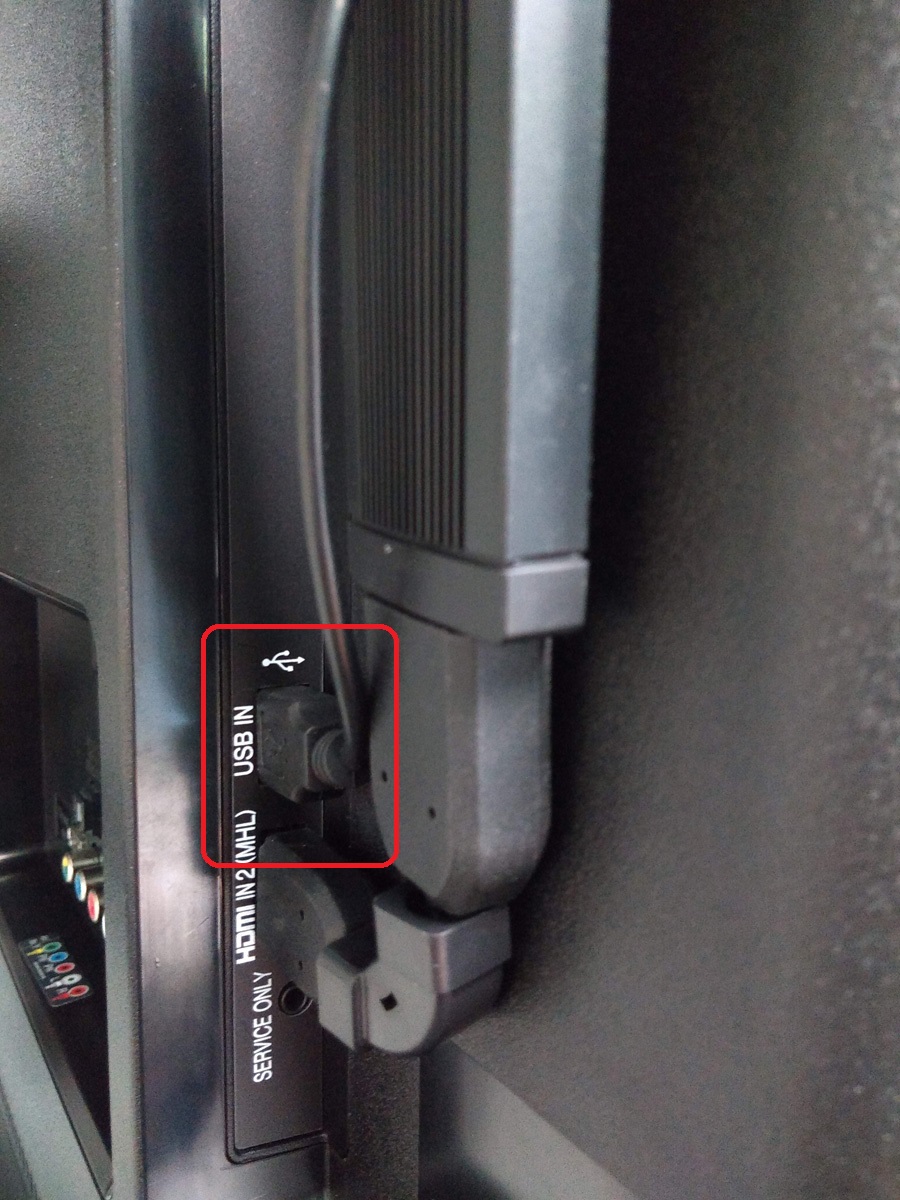
- Power the Nano-PC with the TV USB Port (recommended)
- Remove the USB Cable from the Power Adapter

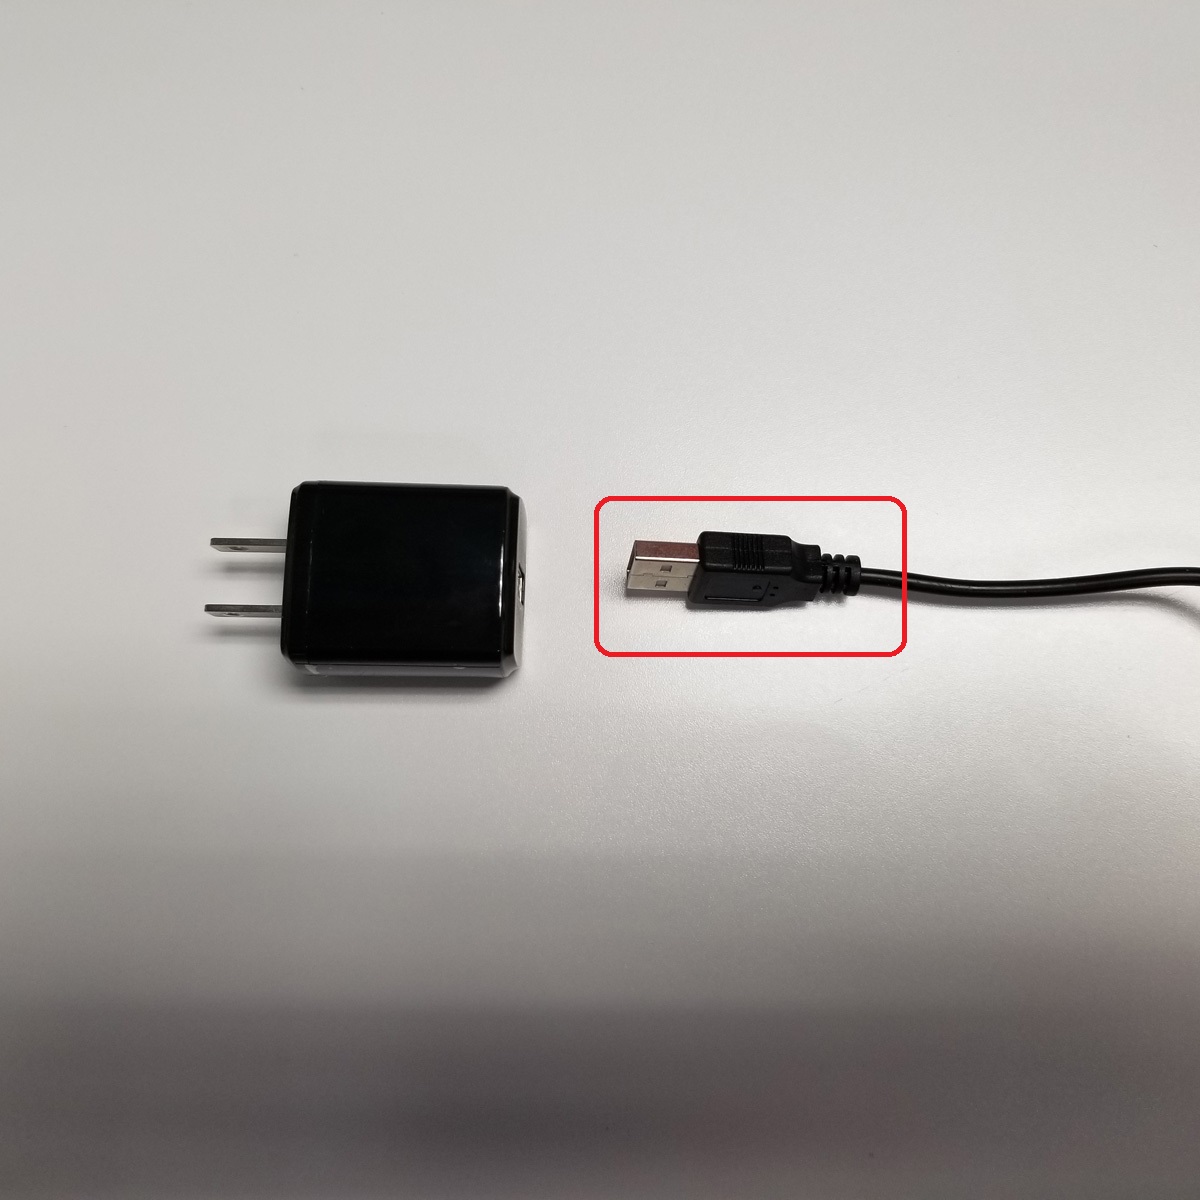
- Plug in the USB Cable directly into the TV USB Port
- Remove the USB Cable from the Power Adapter
- Power the Nano-PC with the included Power Adapter
- Plug in the Power Adapter into an available Electrical Outlet (or Surge Protector)
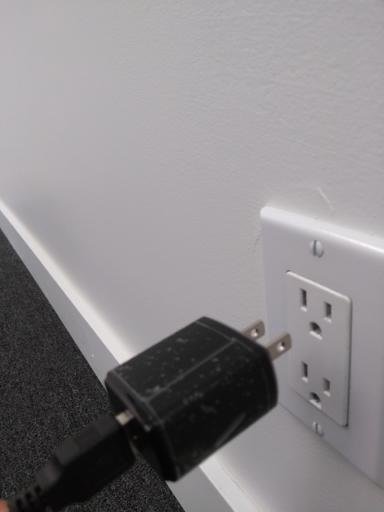

- Plug in the Power Adapter into an available Electrical Outlet (or Surge Protector)
- Power the Nano-PC with the TV USB Port (recommended)
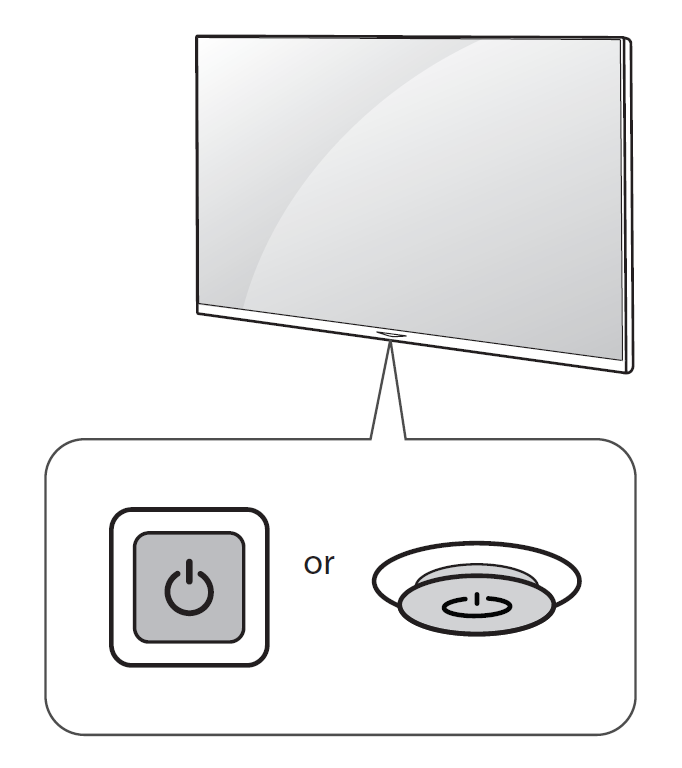
Turn ON the TV
- Use either the Remote or the physical Power Button the TV (Remote and Power Button will vary depending on the TV model)

- Change the TV Input to the installed HDMI Port
Setup a Layout
- Create a Custom Code Channel
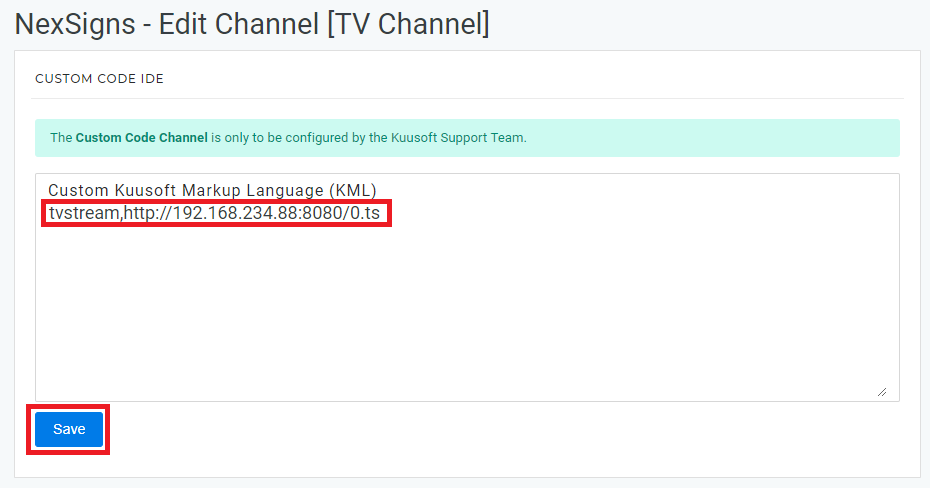
Copy and Paste the following code into the Custom Kuusoft Markup Language (KML) Text Box and press Save
tvstream,http://192.168.234.88:8080/0.ts
- Create a Layout
- Create a Container and connect it to the previously created Custom Code Channel
- Press Publish to view the TV Streaming Input
There is typically a 5 second delay in the response time of the Live TV Stream.
To change channels, you will need to point and use the included remote at your Cable TV box (or other HD input device)
Applies to
Nano-PC2, Nano-PC3, TV Transmission V2
Related articles