Time Condition Channel
- Kuusoft Support
- James Yeoh
Owned by Kuusoft Support
Last updated: Feb 28, 2024 by James Yeoh
A Time Condition Channel allows users to create a schedule and display different Layouts based on the current date and time.
Some examples
- Display 7 different Layouts on every day of the week (Monday to Sunday)
- Display a breakfast menu until 10:30 am then a regular menu afterwards
- Display happy hour specials only from 3 to 5 pm daily
- Display a lunch menu until 4 pm then a dinner menu afterwards
Info
Default time is to Pacific Time (PT)
Tutorial - Change the Time Zone Setting (Nano-PC Device)
Tutorial - Change the Time Zone Setting (OnePass Account)
Topics Covered
Login to OnePass and navigate to your NexSigns license
- Login to OnePass - (For more information, see How to access OnePass)
- Click on Application then select NexSigns
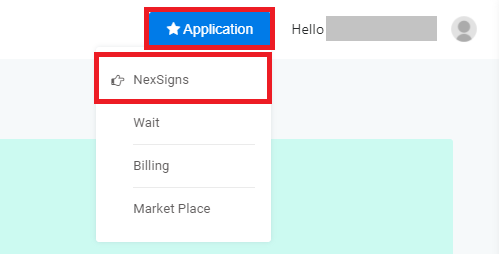
- Click on Start Action on your desired Product License

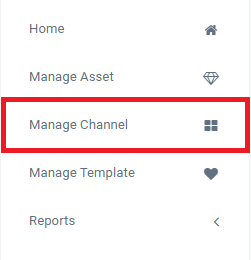
Create a Time Condition Channel
- Select Manage Channel located in the left menu
- Click on Create New Channel
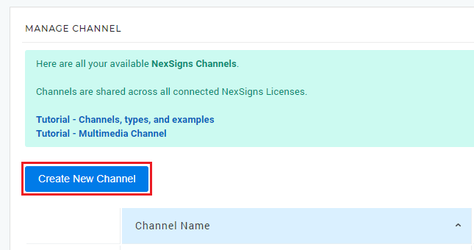
- Enter a Channel Name, Description, select TimeCondition in the Channel Type drop-down menu, and press Continue

- Select Continue to finish creating a new Time Condition Channel
Schedule the Layouts for a Time Condition Channel
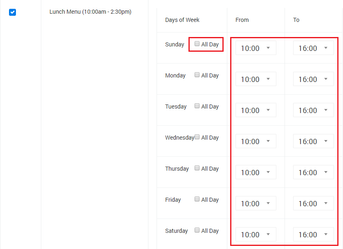
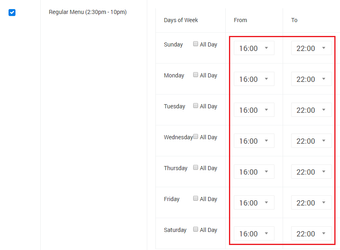
Select the Layouts you would like to display by clicking the Include button next to the Layout Name
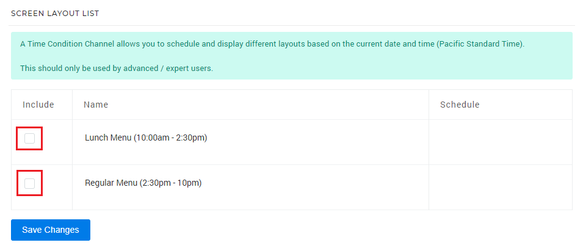
- Use the drop down boxes to schedule the times for each Layout to be displayed. Select All Day to display the Layout for the entire day.
- Select Save Changes
- You have successfully configured your Time Condition Channel.
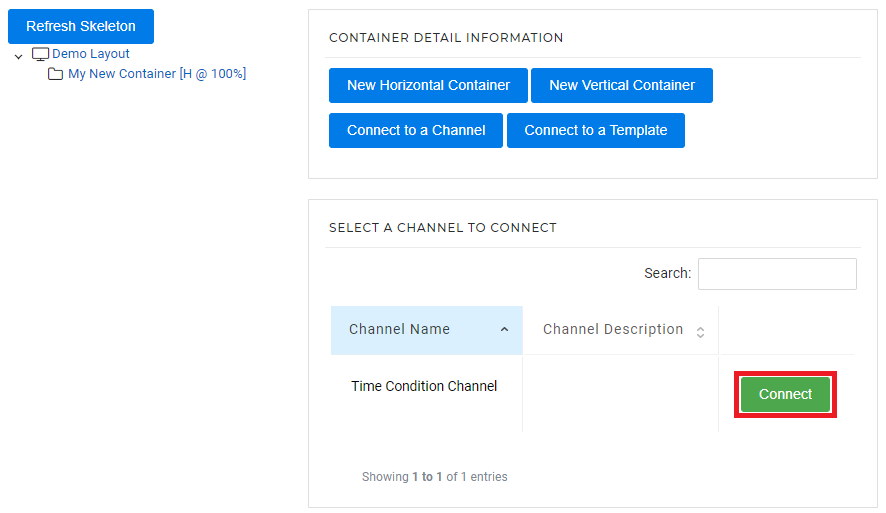
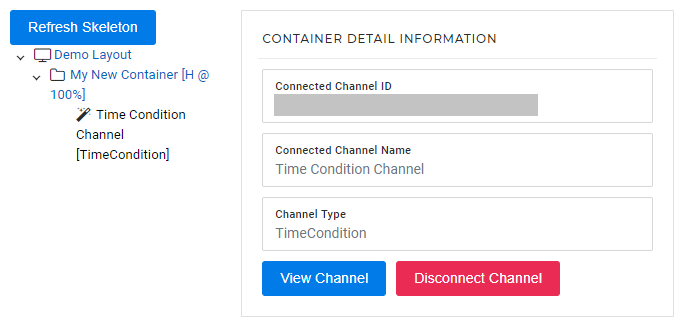
Connect the Time Condition Channel and Publish the Layout
Create or select a Layout
For more information on Layouts, see this article- Connect the Layout to your previously created Time Condition Channel
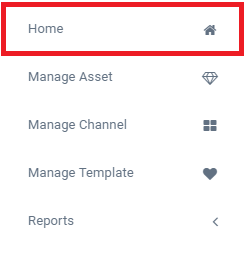
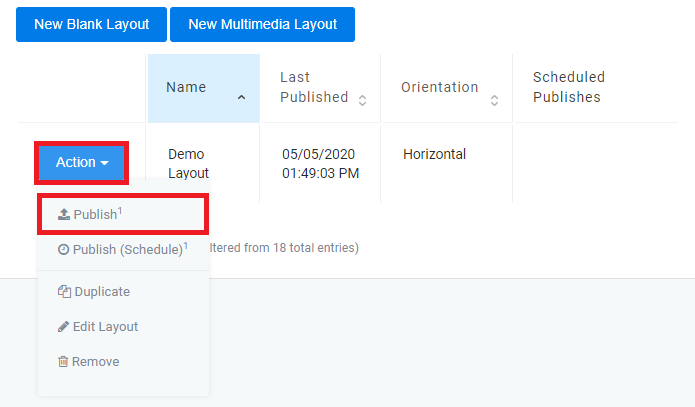
- Click on Home in the left menu bar to return to your Layout list
- Find the desired Layout, click on Action then Publish
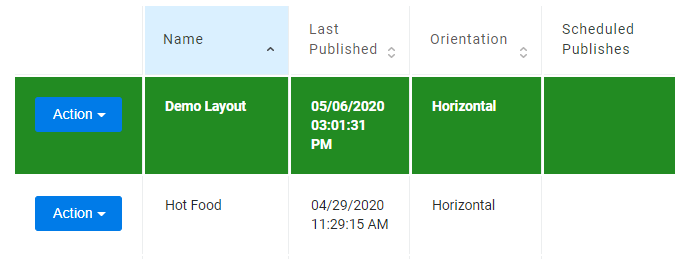
- You have successfully published your Layout connected to your Time Condition Channel
Once published, the Active Layout will be highlighted in green and your device will start downloading the new Layout automatically.
Related articles
, multiple selections available, Use left or right arrow keys to navigate selected items