/
How to Manage Role Policy Groups (Permission Groups)
How to Manage Role Policy Groups (Permission Groups)
This article will cover how to manage Role Policy Groups (Permission Groups) for your OnePass sub-users. This will help manage permissions and maximize security when Granting Access to your OnePass Account.
Related Articles
Topics Covered
Create a Role Policy
- Login to OnePass - (For more information, see How to access OnePass)
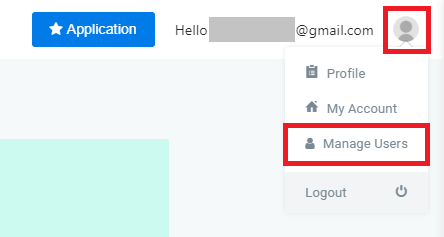
- Click on the Account Menu icon located at the right top corner of the page and select Manage Users
- Click on Role Policy Editor
- Click on + Add New Role Policy
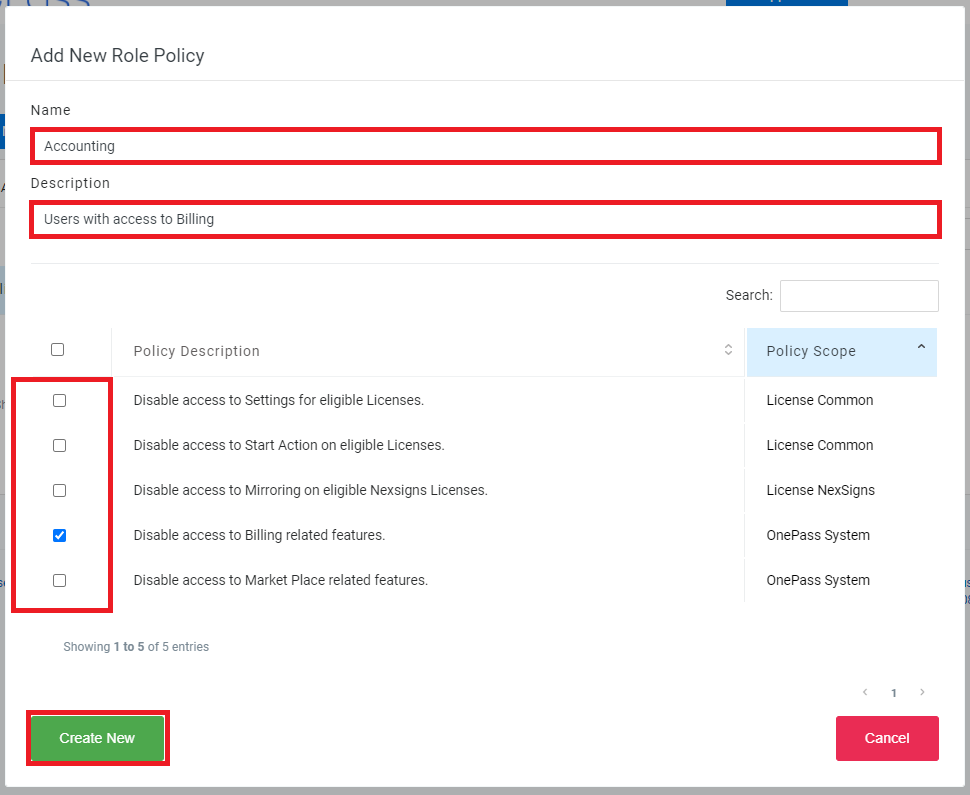
- Enter Name, Description, select the desired Permissions, and click on Create New
- You have successfully Created a Role Policy
Edit a Role Policy
- Login to OnePass - (For more information, see How to access OnePass)
- Click on the Account Menu icon located at the right top corner of the page and select Manage Users
- Click on Role Policy Editor
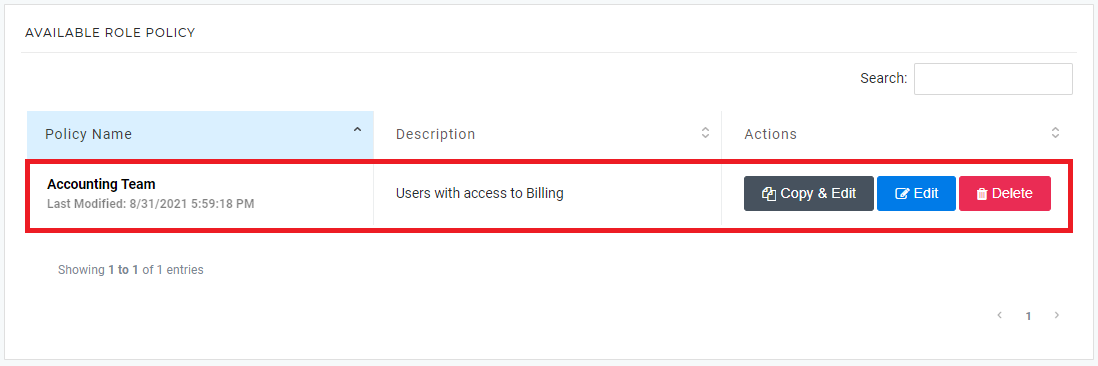
- Find the desired Role Policy and click on Edit
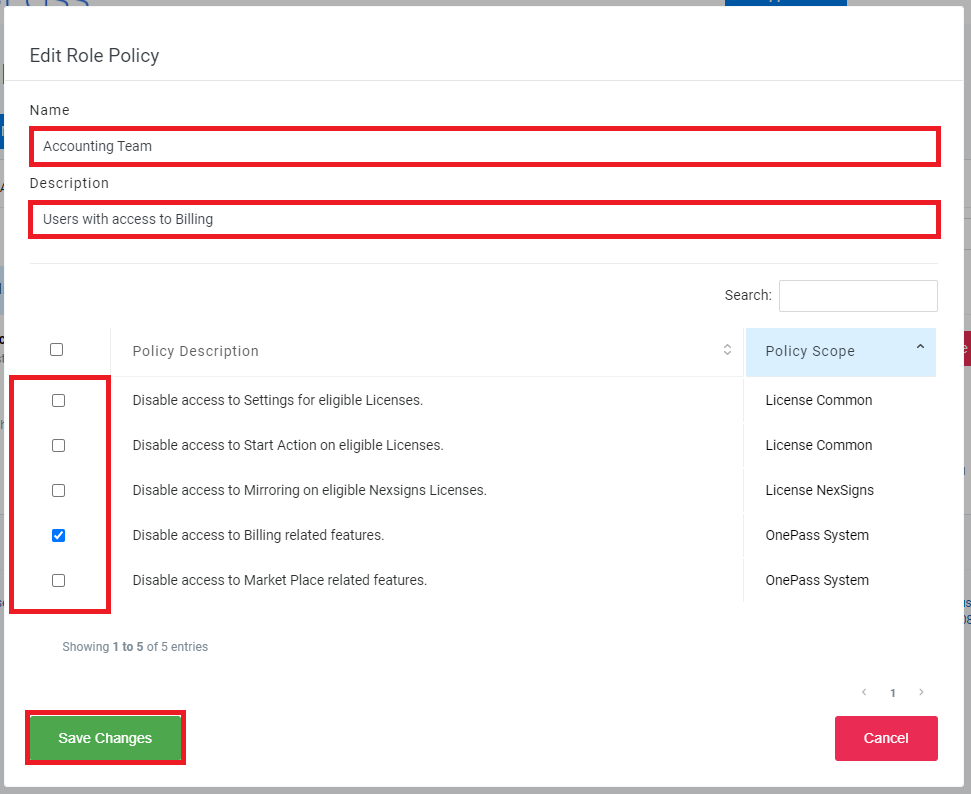
- Update the Name, Description, select the desired Permissions, and click on Save Changes
- You have successfully Edited a Role Policy
Delete a Role Policy
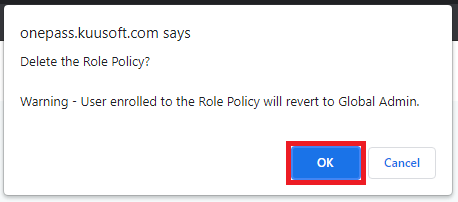
Users enrolled to a deleted Role Policy will revert to Global Admin
- Login to OnePass - (For more information, see How to access OnePass)
- Click on the Account Menu icon located at the right top corner of the page and select Manage Users
- Click on Role Policy Editor
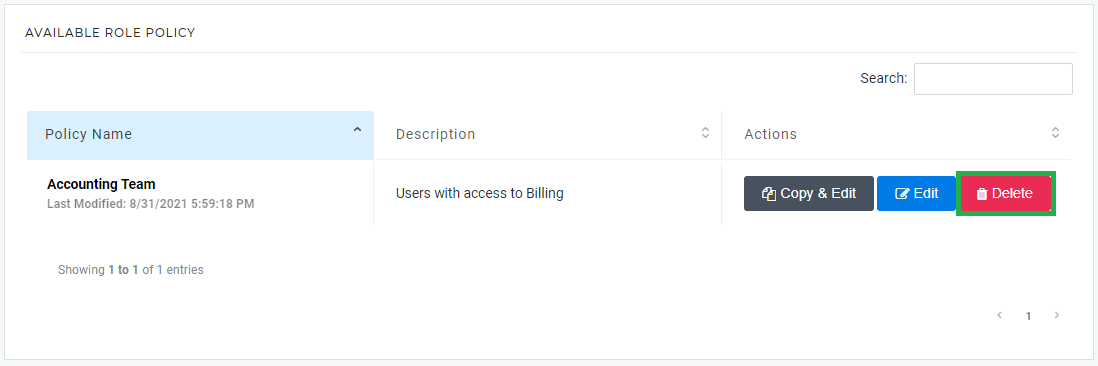
- Find the desired Role Policy and click on Delete
- Click on OK
- You have successfully deleted a Deleted a Role Policy
Assign a Role Policy
You need to Grant Access to your OnePass Account before Assigning a Role Policy
- Login to OnePass - (For more information, see How to access OnePass)
- Click on the Account Menu icon located at the right top corner of the page and select Manage Users
- Find the desired Sub-User and Click on the Edit Icon
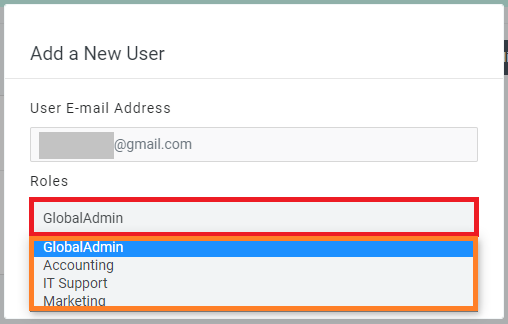
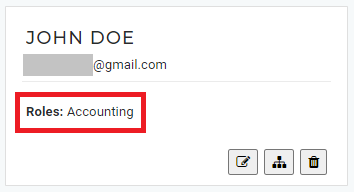
- Click on the Roles dropdown box and select the desired Role Policy
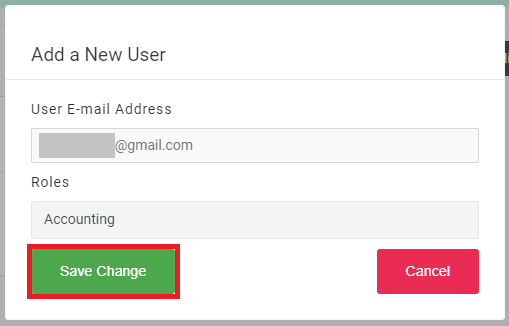
- Click on Save Change
- You have successfully Assigned a Role Policy
Related articles
Related content
How to Restrict Access to Licenses and Manage License Groups
How to Restrict Access to Licenses and Manage License Groups
More like this
Create and Publish a Multimedia Playlist
Create and Publish a Multimedia Playlist
Read with this
How to Manage Users for your OnePass account (grant / remove access)
How to Manage Users for your OnePass account (grant / remove access)
More like this
How to change your OnePass password
How to change your OnePass password
More like this
Create a new OnePass account
Create a new OnePass account
More like this
How to reset your OnePass password
How to reset your OnePass password
More like this
