A TV Transmission Device allows users to integrate Live Television or other Digital Media along with their NexSigns Digital Signage. \
Topics Covered
| Table of Contents | ||||||||
|---|---|---|---|---|---|---|---|---|
|
Printable Setup Instructions
Here are the TV Transmission Setup Instructions - V4
View file name tv-transmission-setup-instructions-V4.pdf height 250
Setup Instructions
Nano-PC3 Retail Box - Parts Included
...
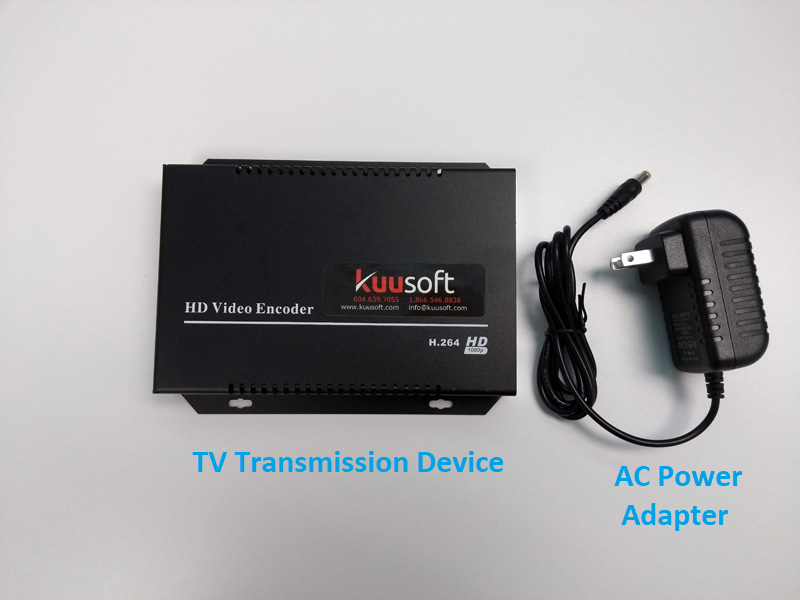
TV Transmission Device - Parts Included


Setup the NexSigns Router
...
Setup the TV Transmission Device V2
- Connect the HDMI cable into the HDMI Input port on the TV Transmission Device
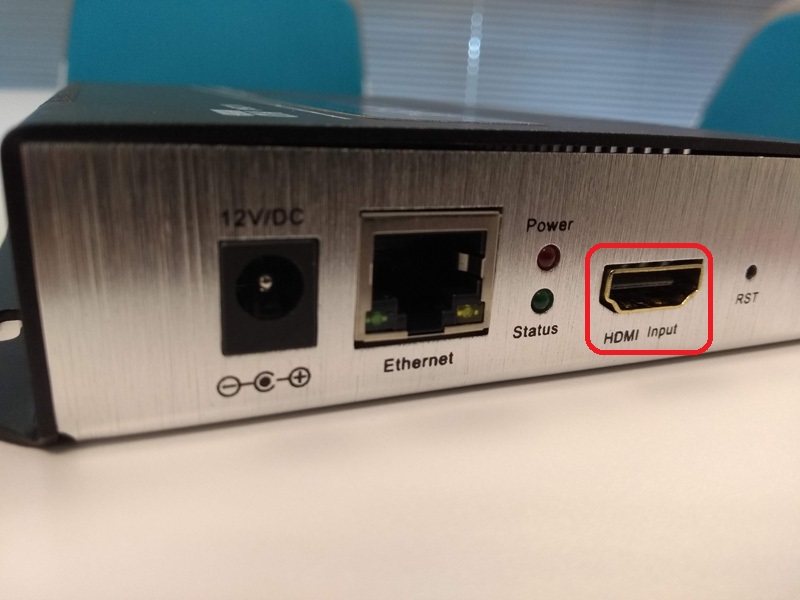
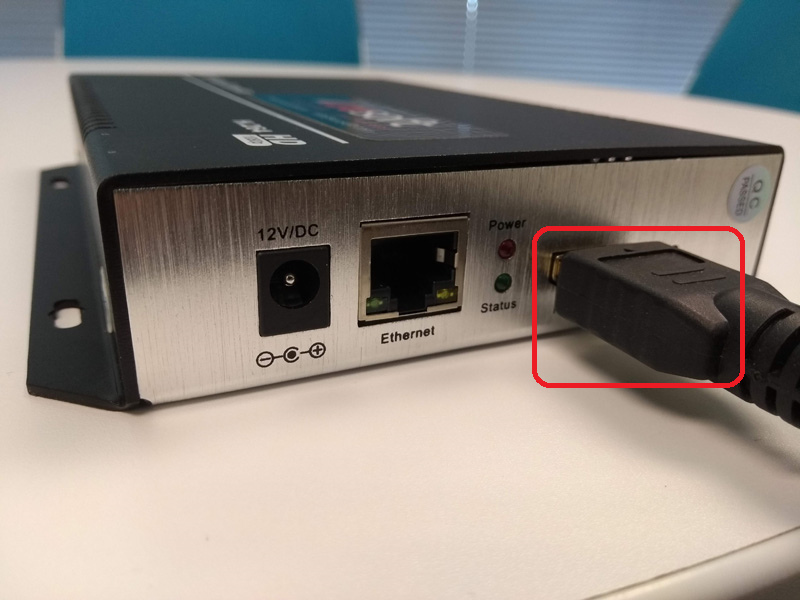
- Plug in the other end of the HDMI cable into your HDTV source
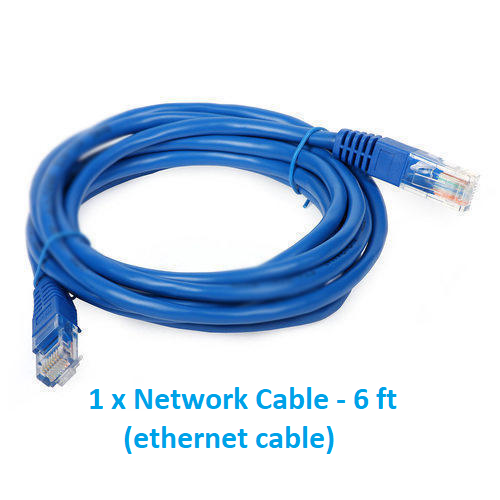
- Connect a Network Cable into the Ethernet port on the TV Transmission device
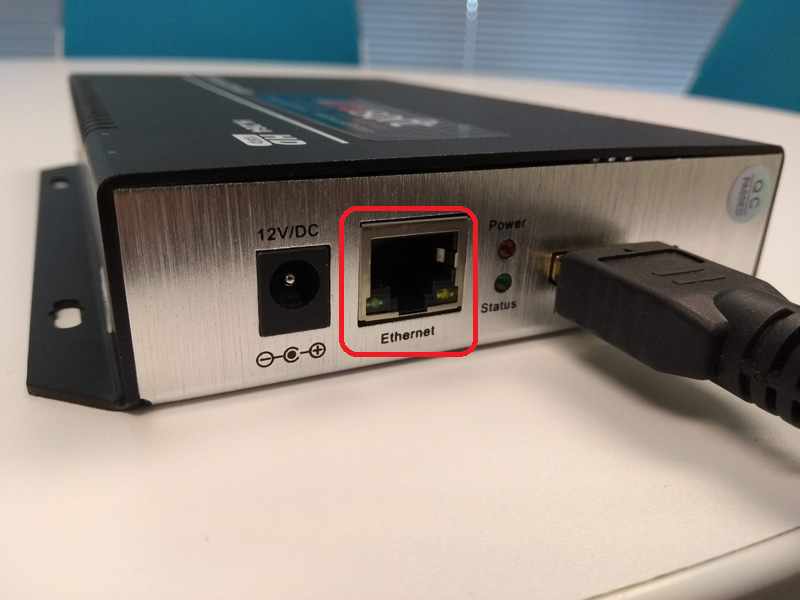

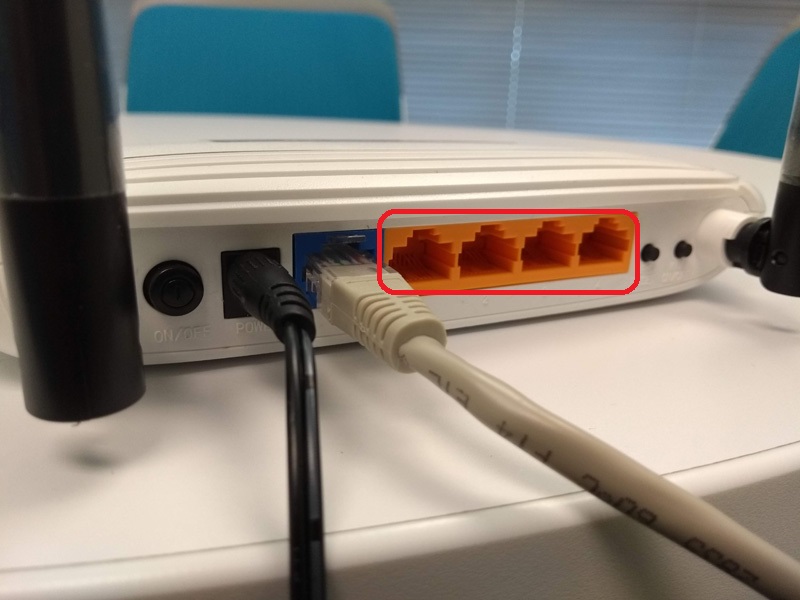
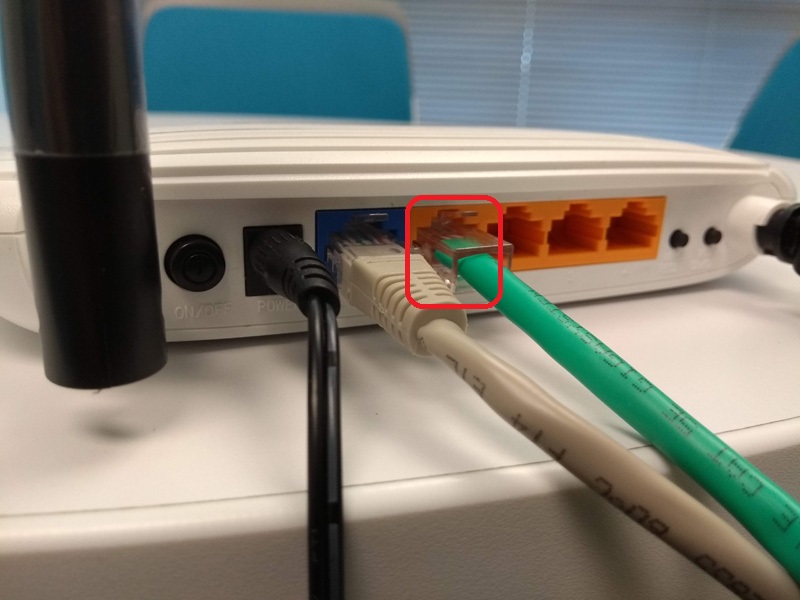
- Plug in the other end of the Network Cable into the NexSigns Existing Router in in a Network Port labeled 1, 2, 3, or 4
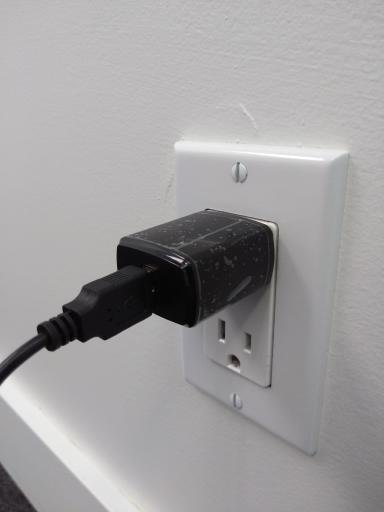
- Connect the AC Power Adapter into the 12V/DC port on the TV Transmission device
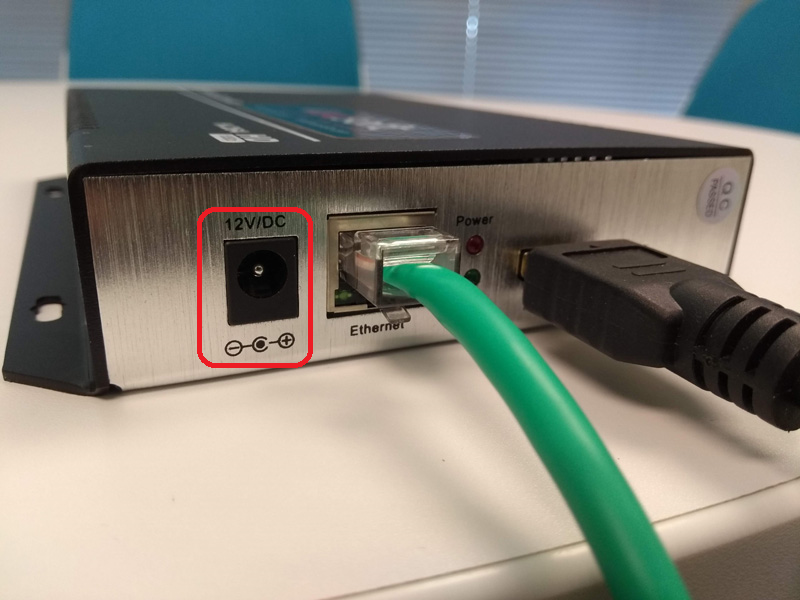
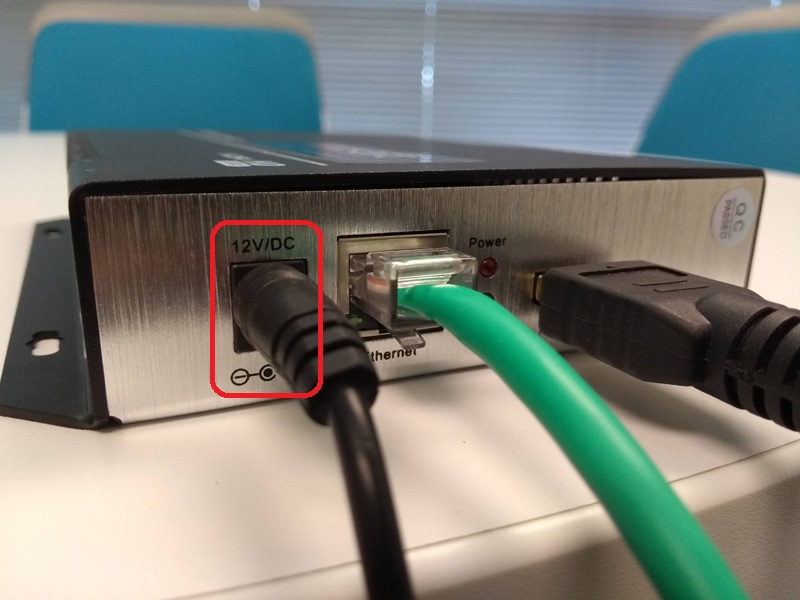
- Plug the other end of the AC Power Adapter into an Electrical Outlet (or Surge Protector)
...
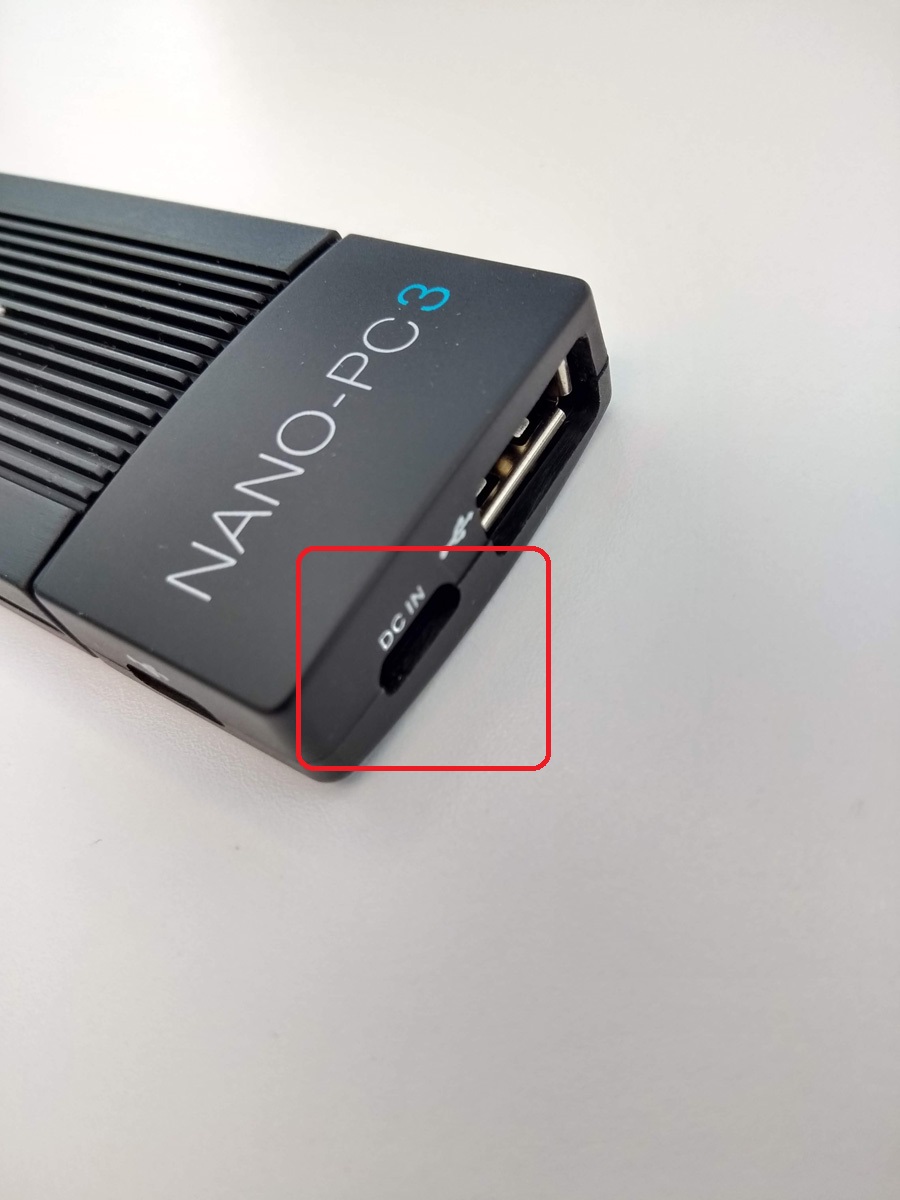
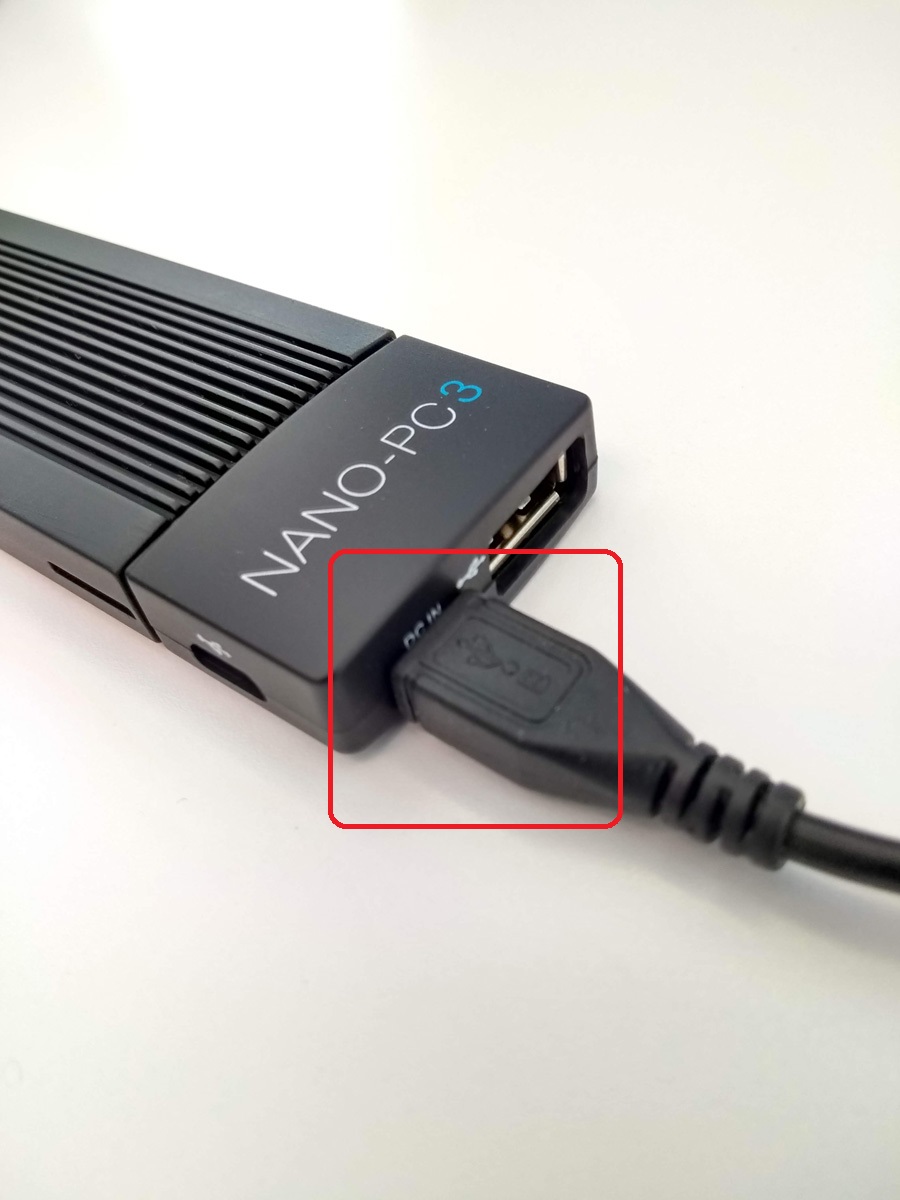
- Plug in the MicroUSB cable into the DC IN port at the bottom of your Nano-PC3
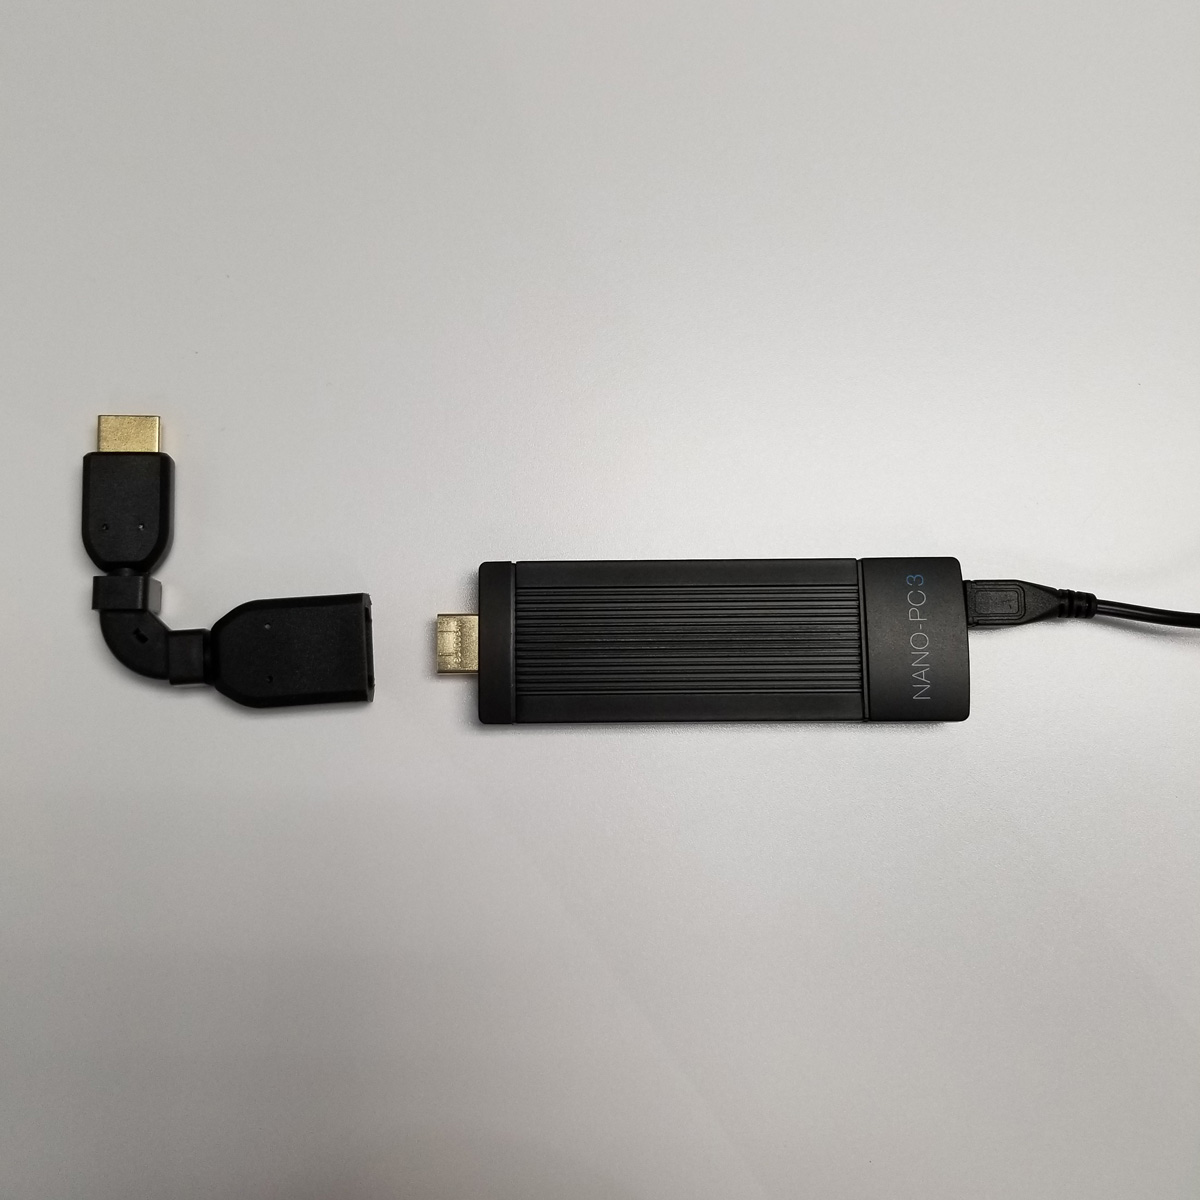
Use the HDMI Extender and Cornering Anchor (optional but recommended)
Info The HDMI Extender and Cornering Anchor is useful to hide the Nano-PC behind the TV, prevents the Nano-PC from blocking the TV USB port, and helps with cable management. - Bend the HDMI Extender to the desired angle and apply the Cornering Anchor to secure it in place
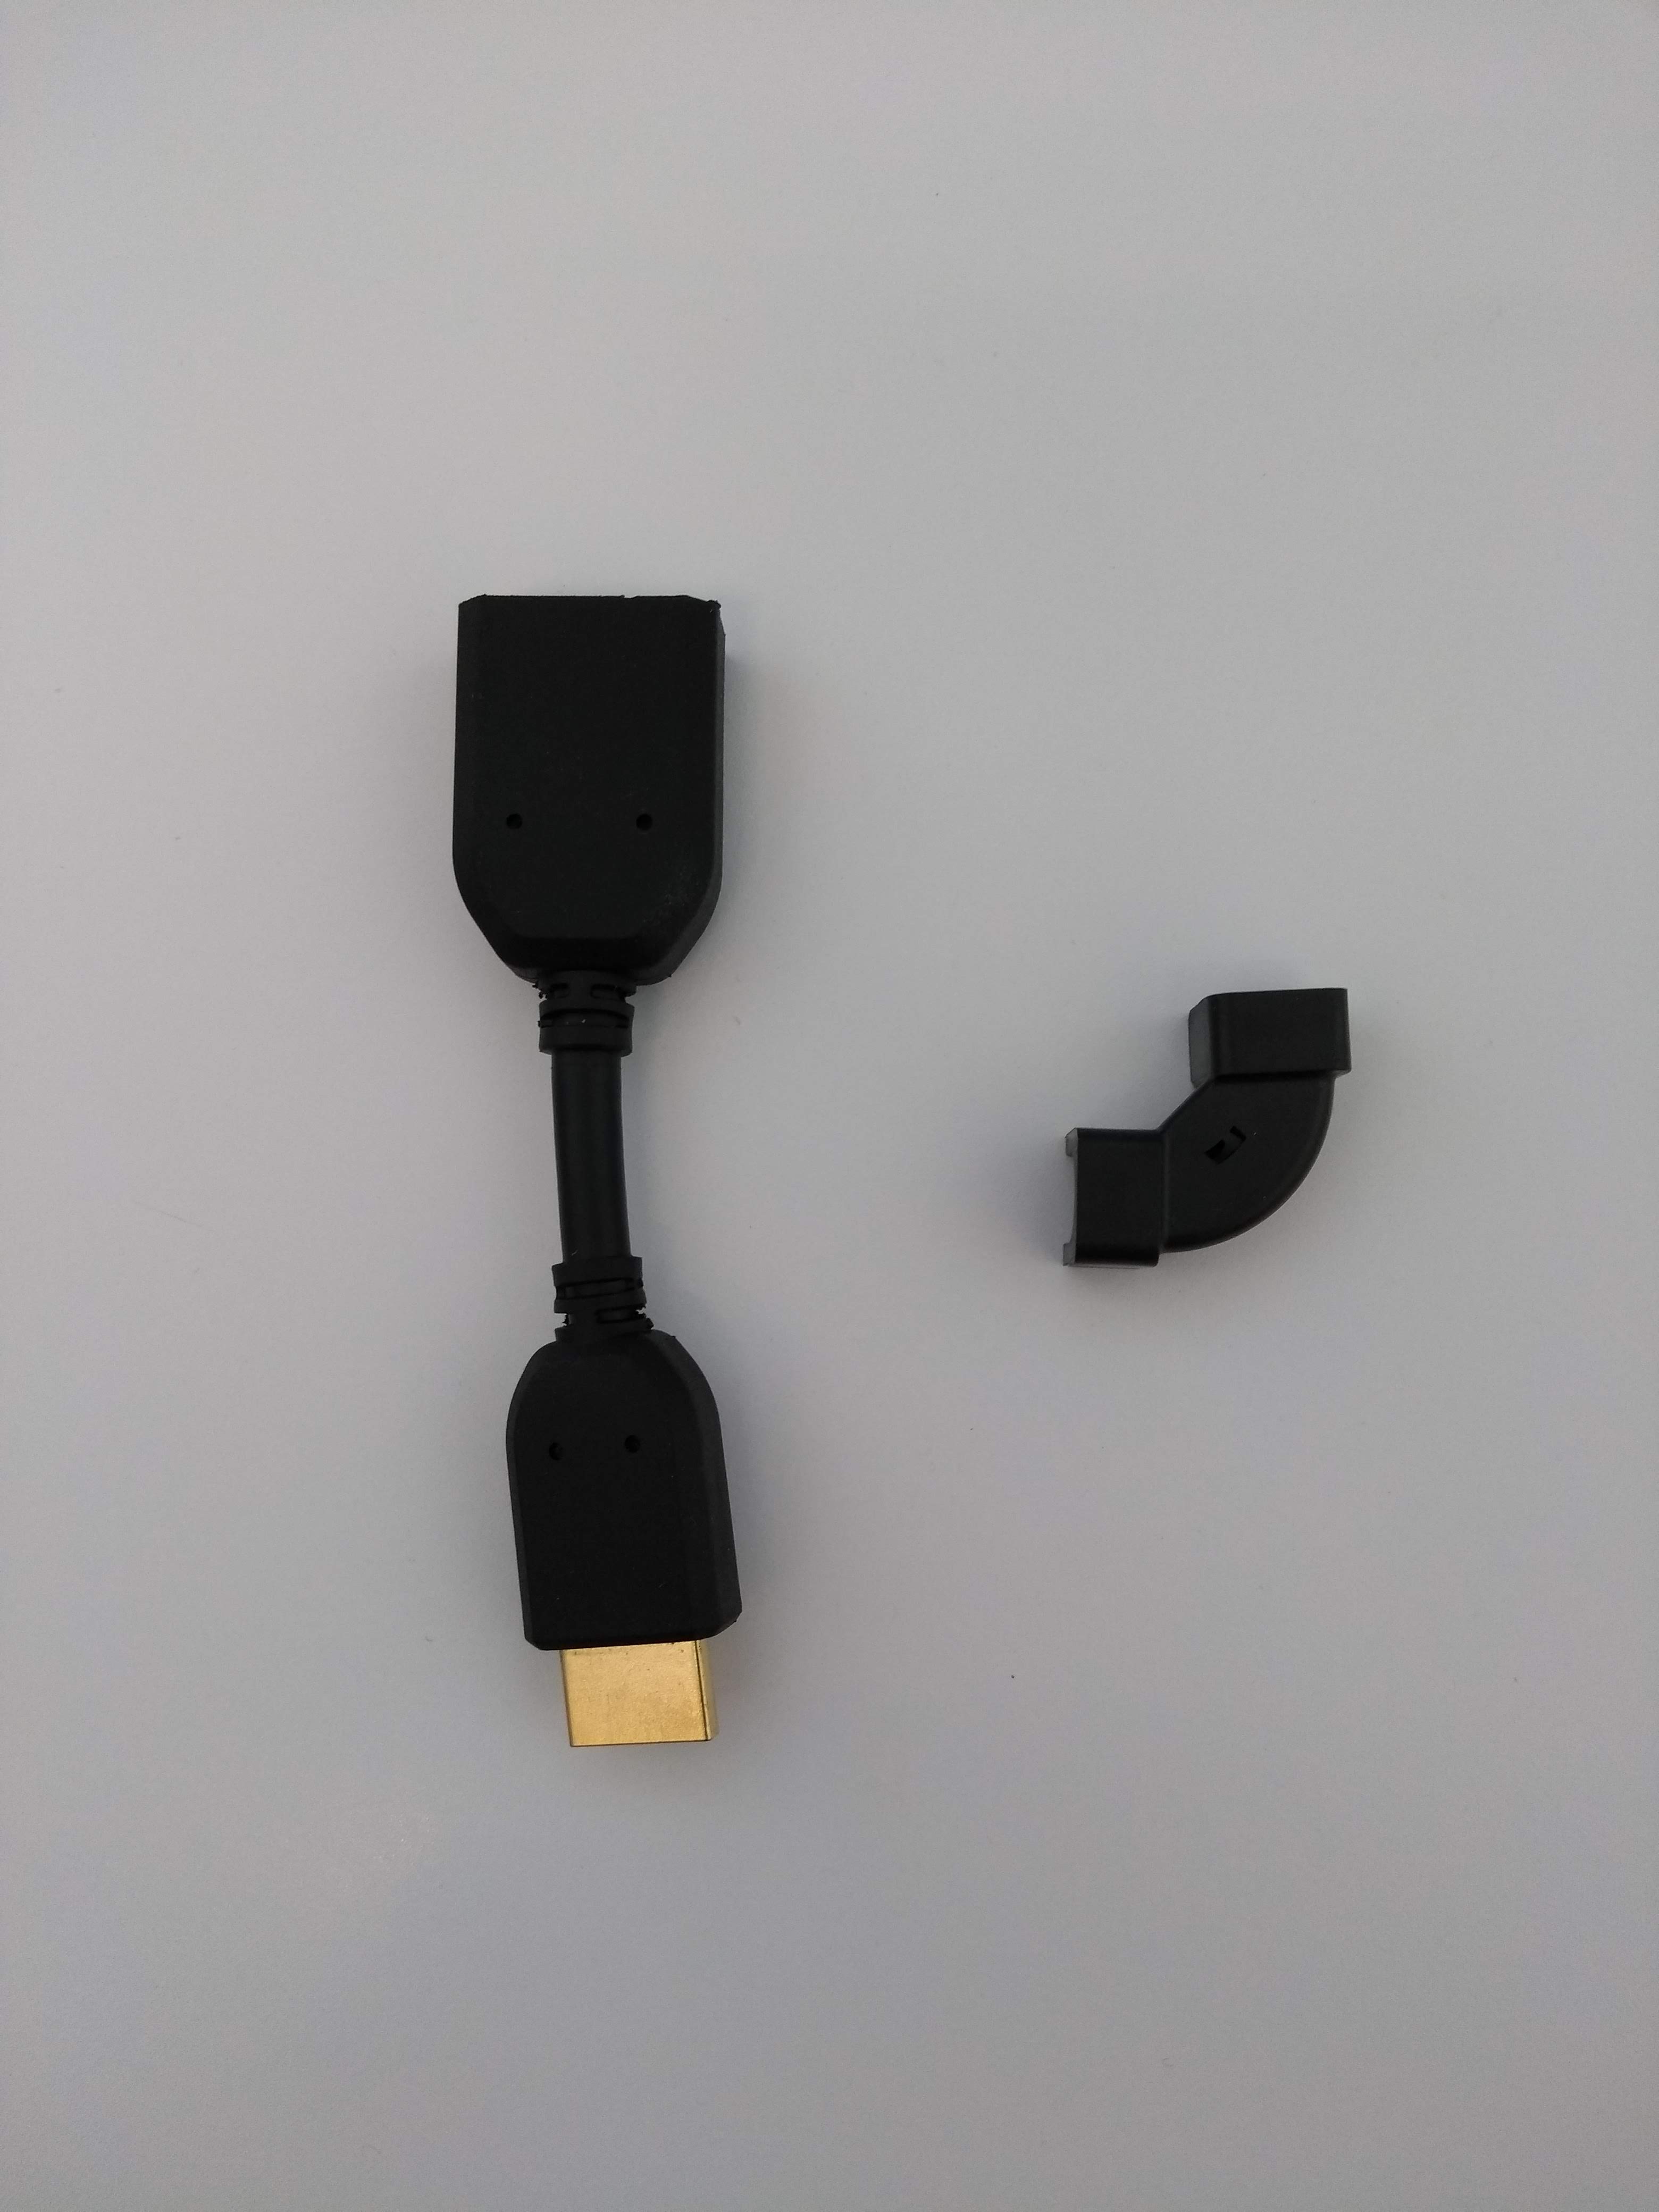
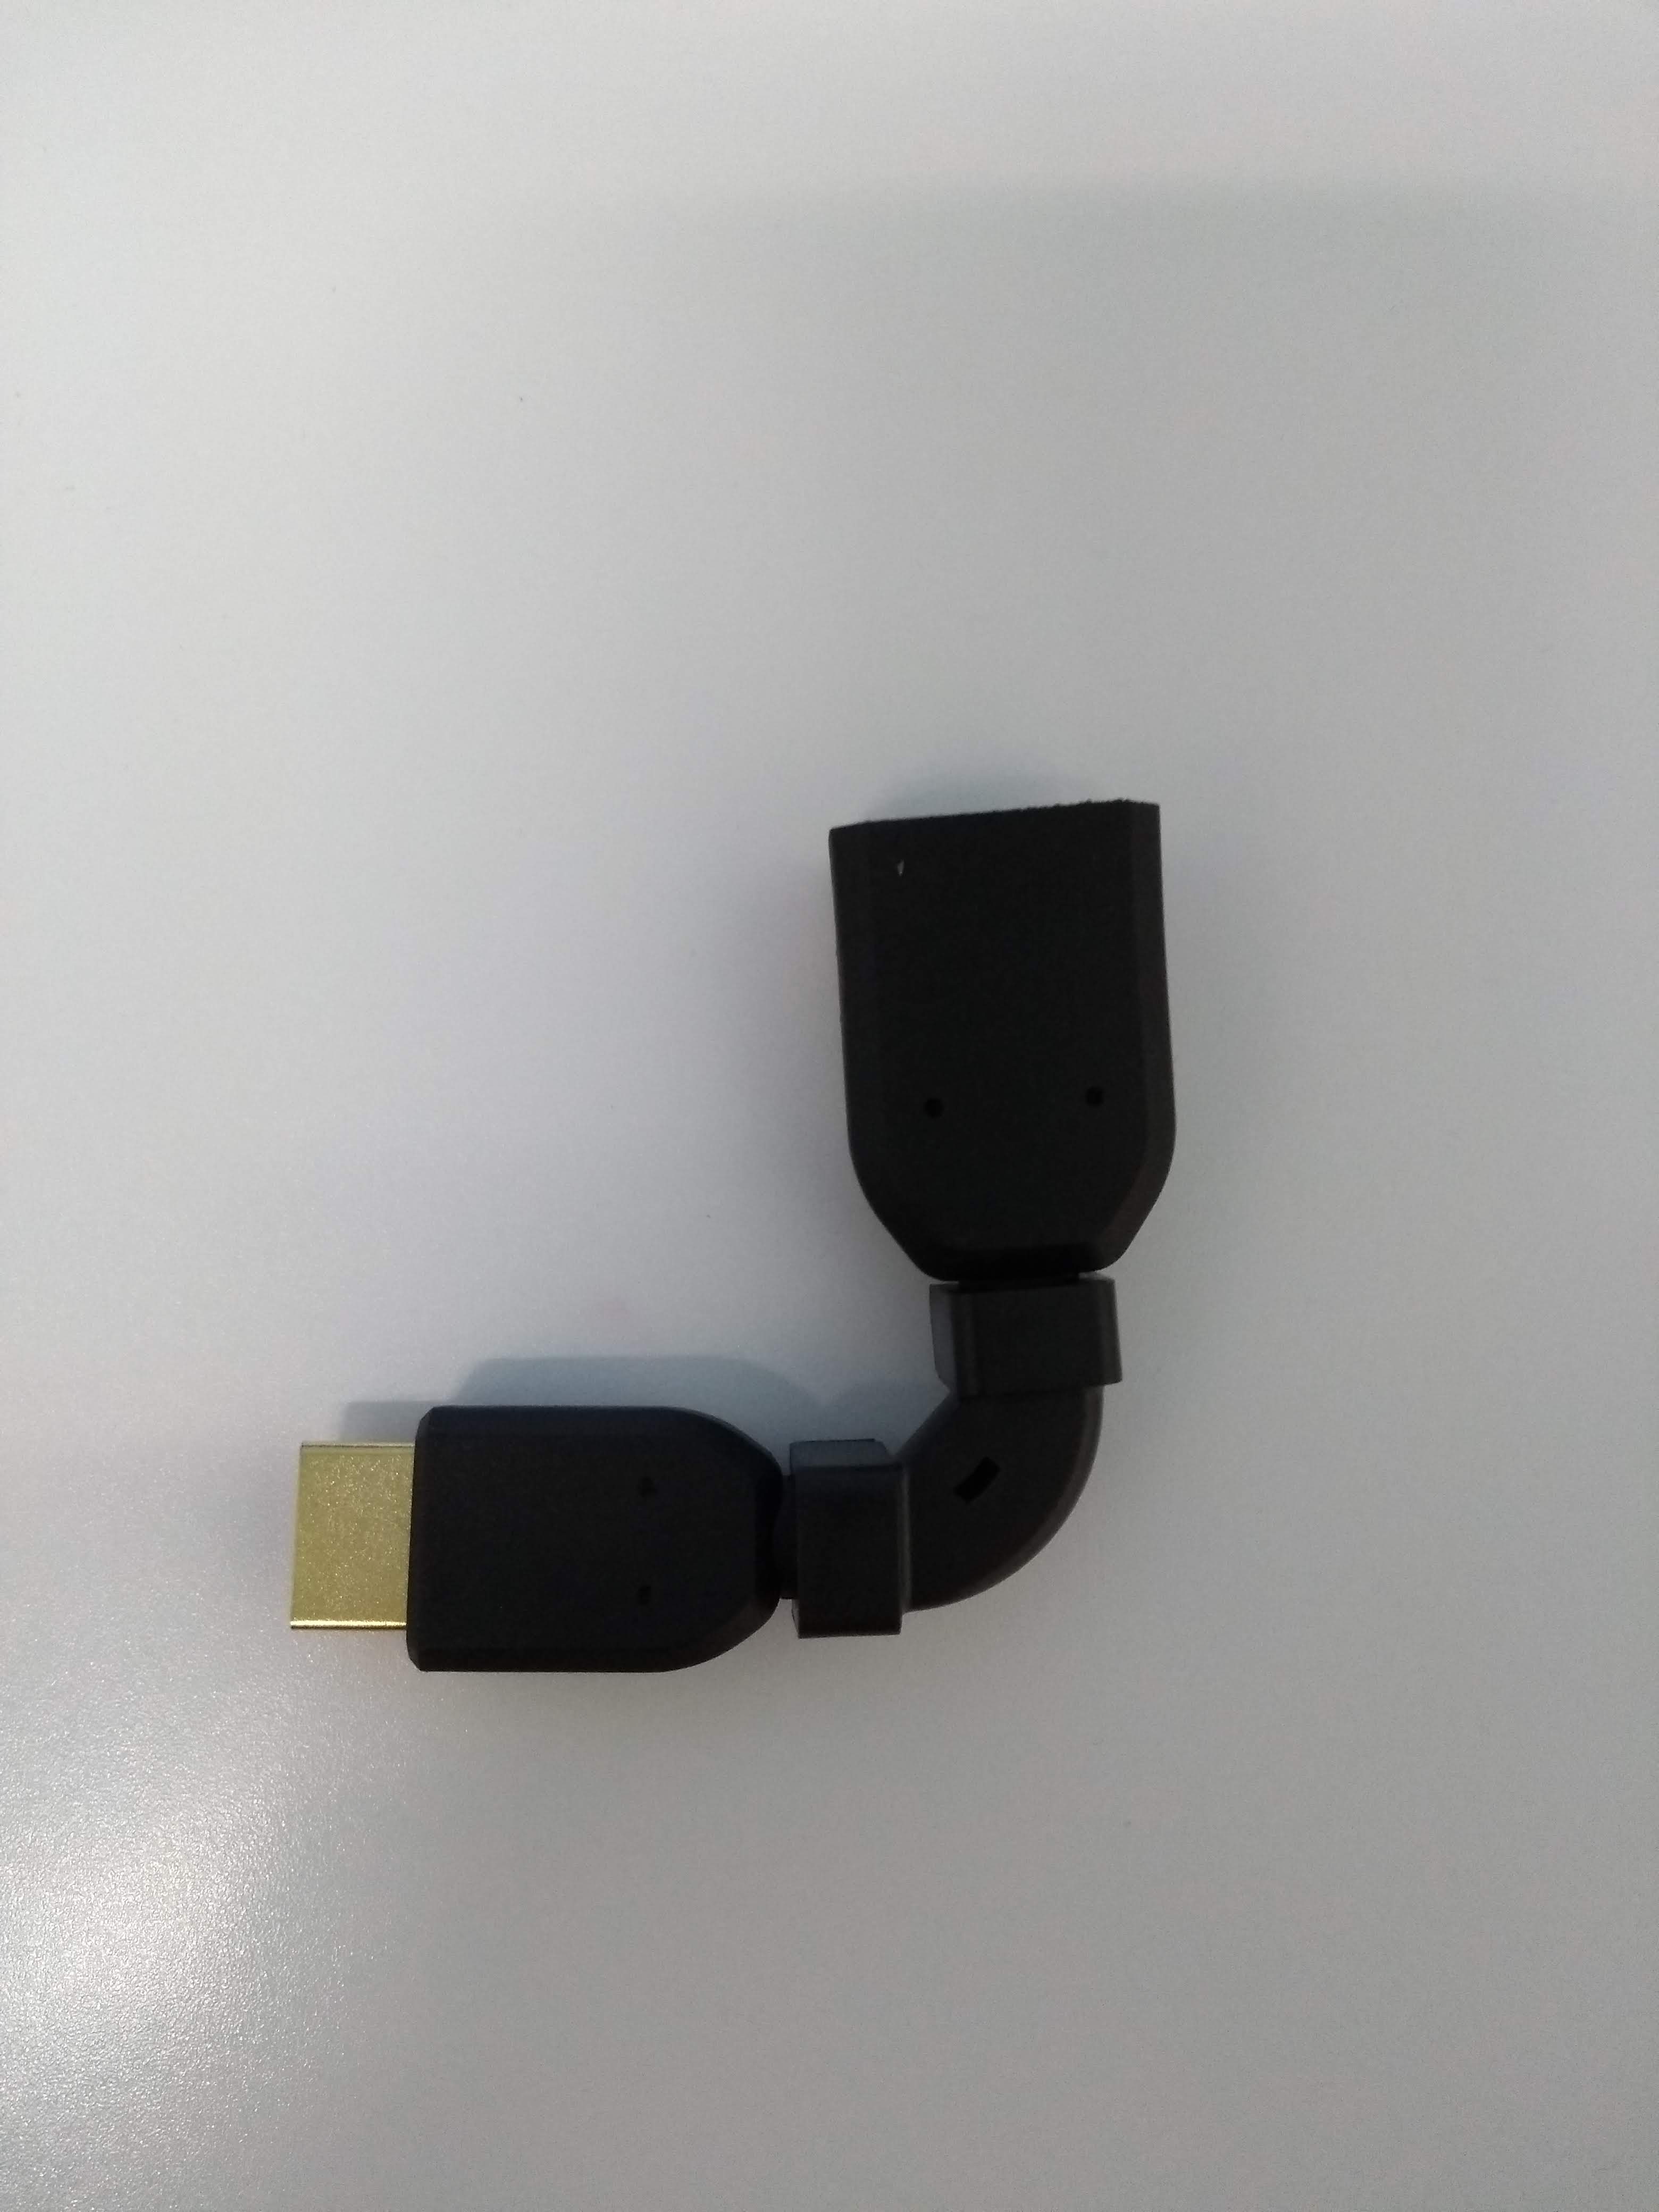
- Plug in the Nano-PC into the HDMI Extender

- Bend the HDMI Extender to the desired angle and apply the Cornering Anchor to secure it in place
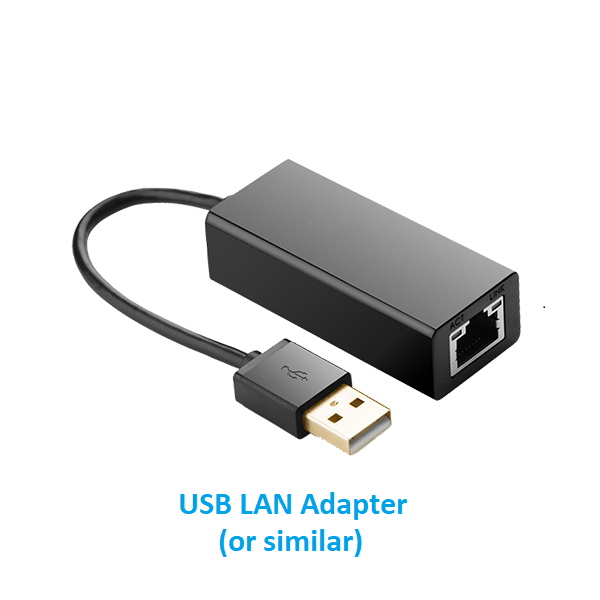
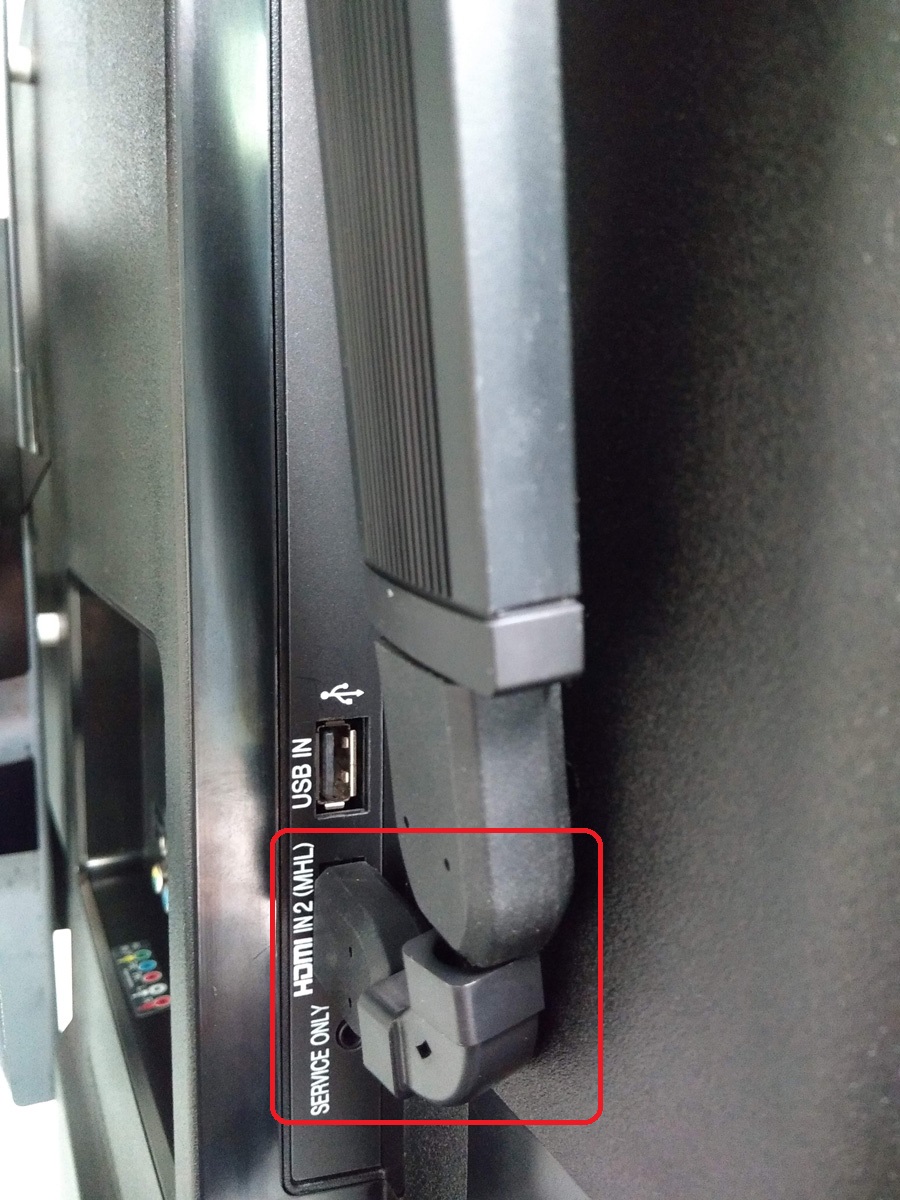
- Plug in the USB LAN Adapter into the Nano-PC
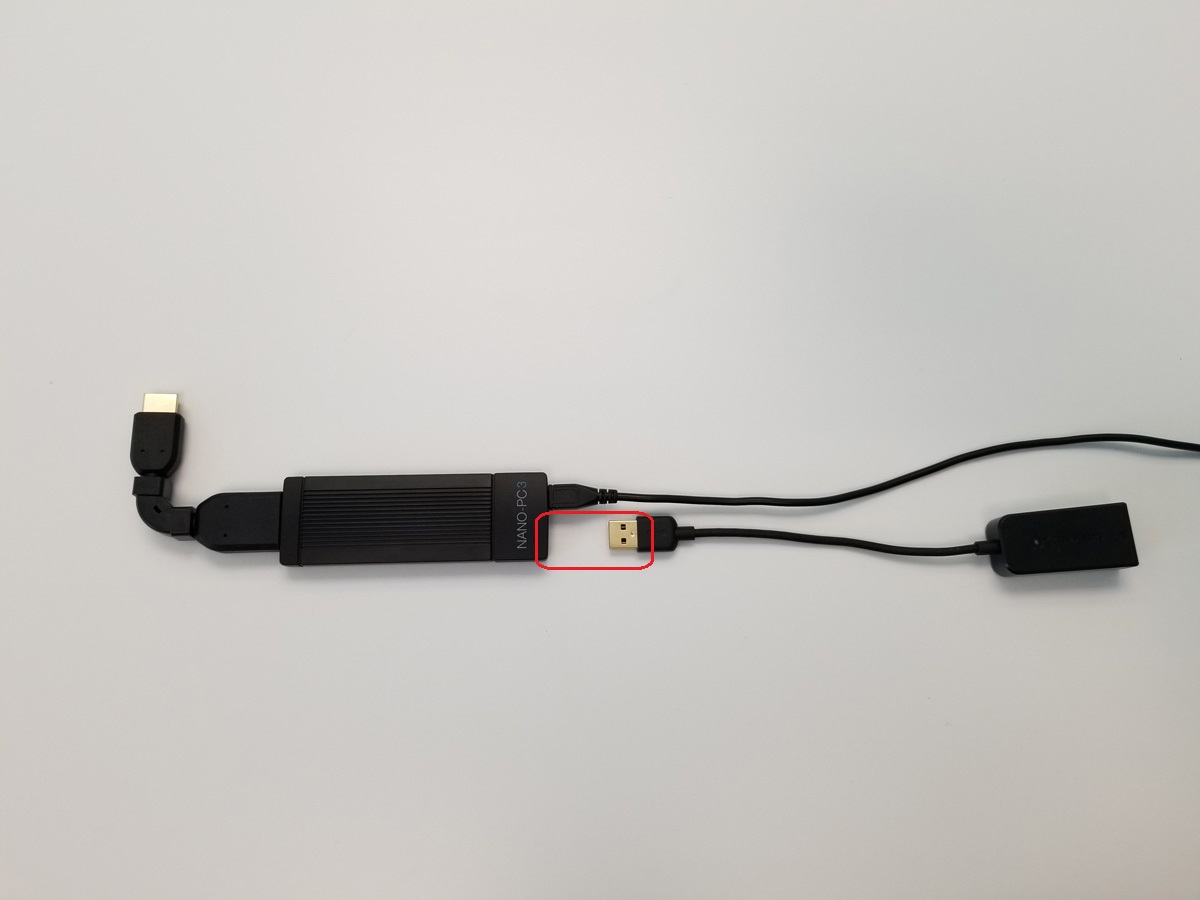
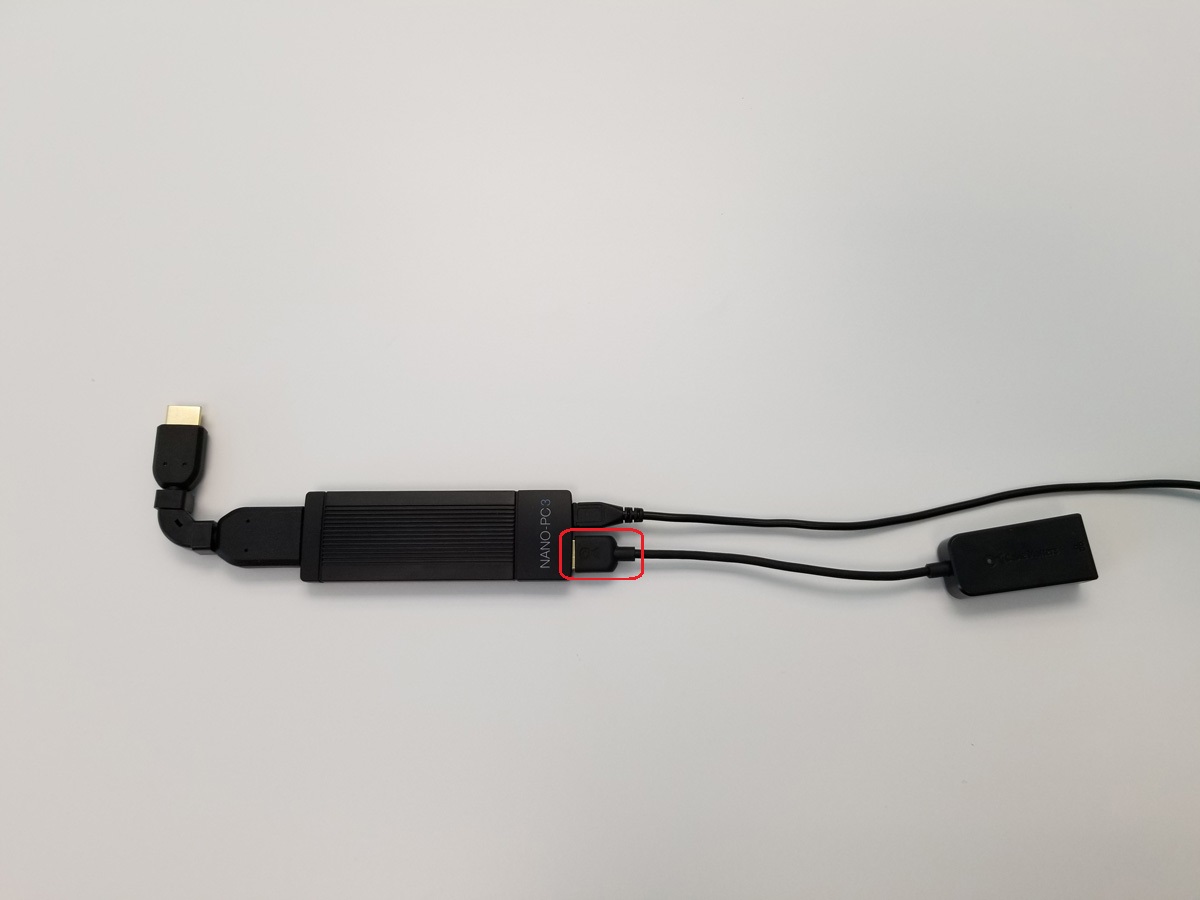
- Plug in one end of the Network Cable (Not Included) into the USB LAN Adapter
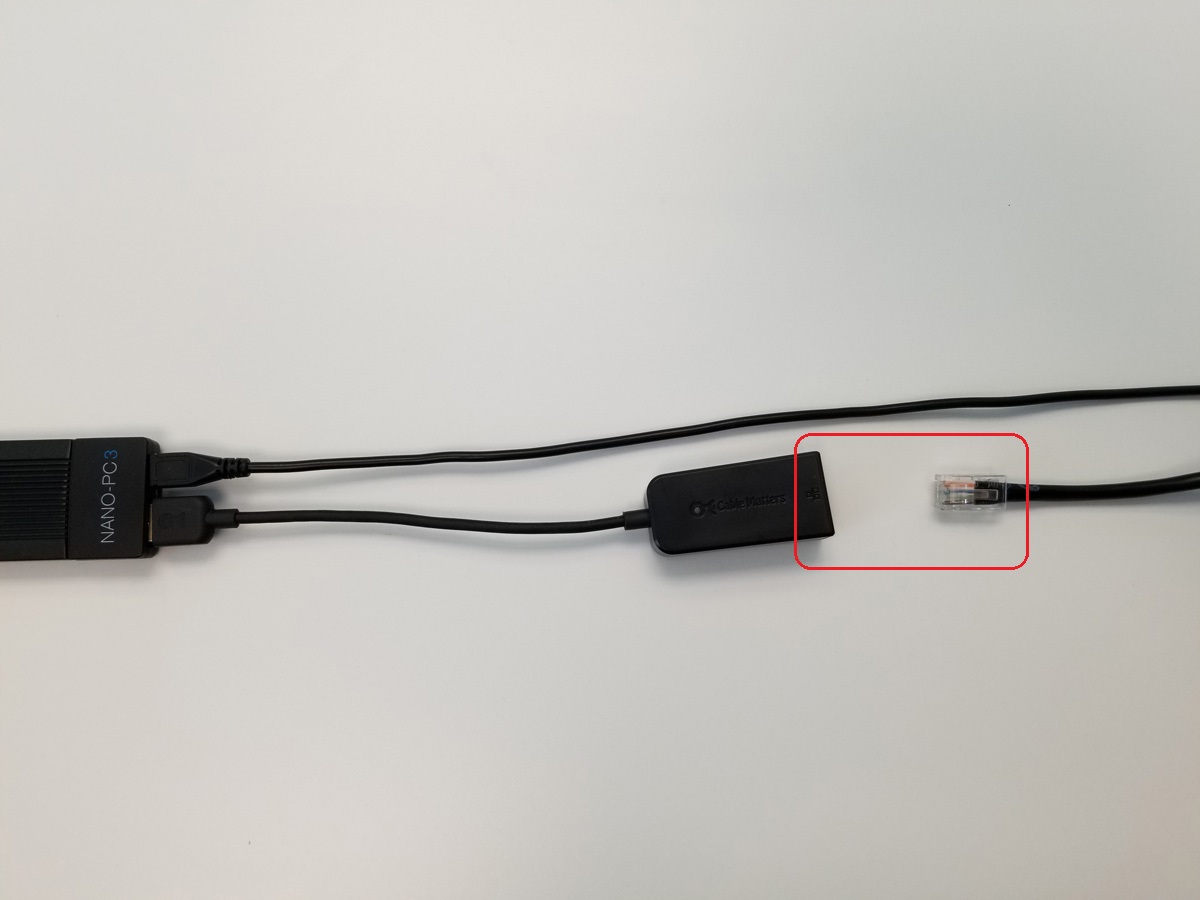
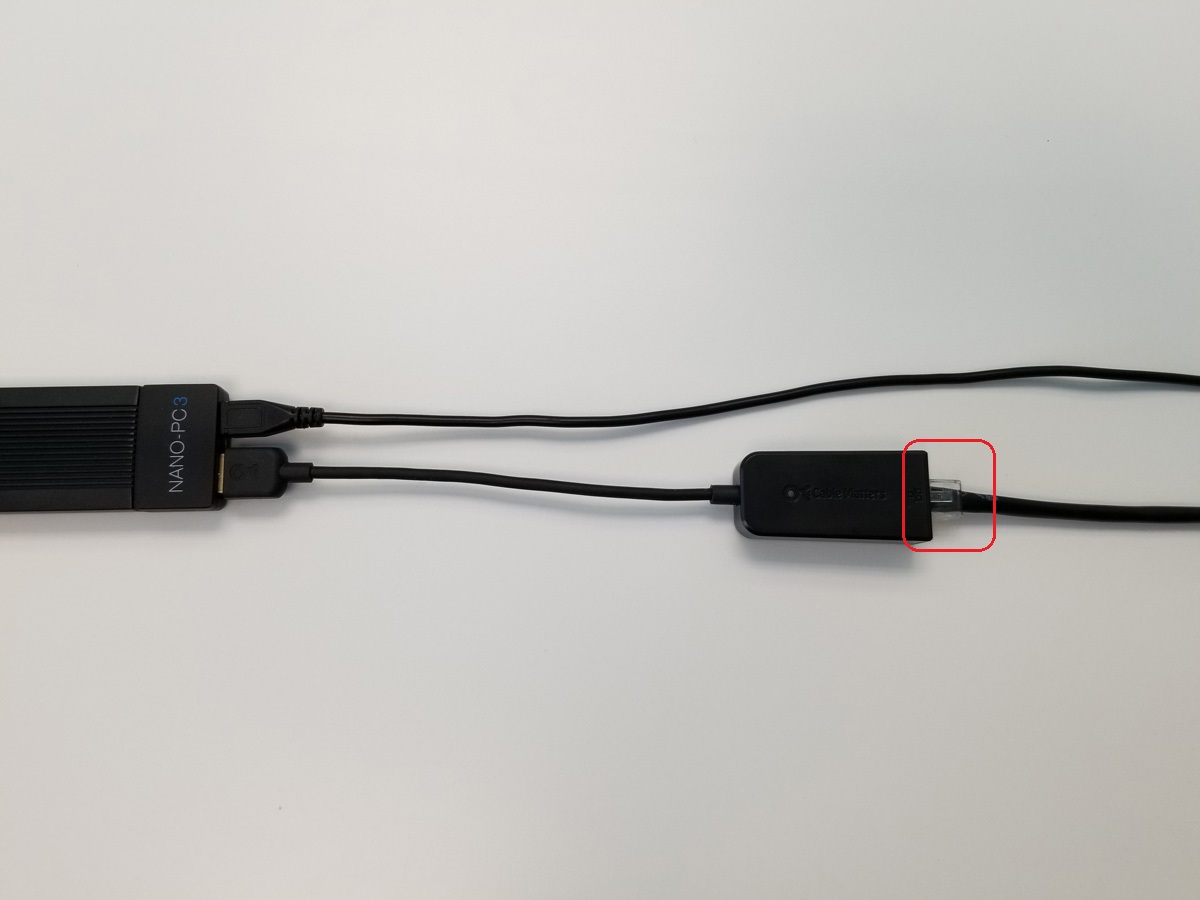
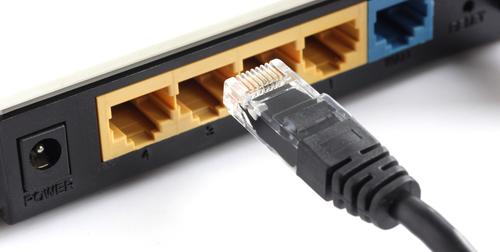
- Plug in the other end of the Network Cable into (Not Included) into a network port on the NexSigns Router the Existing Router in a Network Port labeled 1, 2, 3, or 4
- Plug in the HDMI Extender (with the Nano-PC attached) into your TV's HDMI port (location of the HDMI port may vary depending on the TV model)

- Power the Nano-PC Device (complete EITHER of the following)
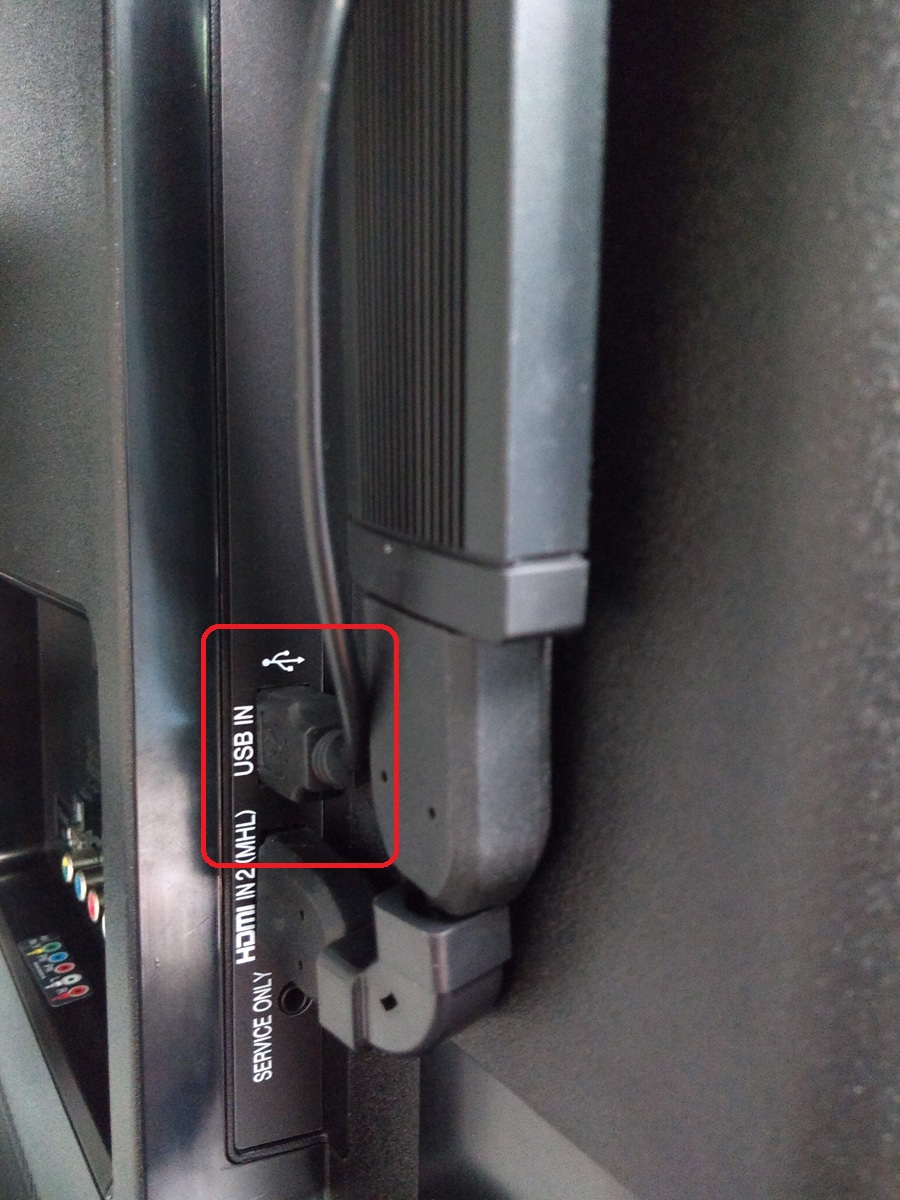
- Power the Nano-PC with the TV USB Port (recommended)
- Remove the USB Cable from the Power Adapter

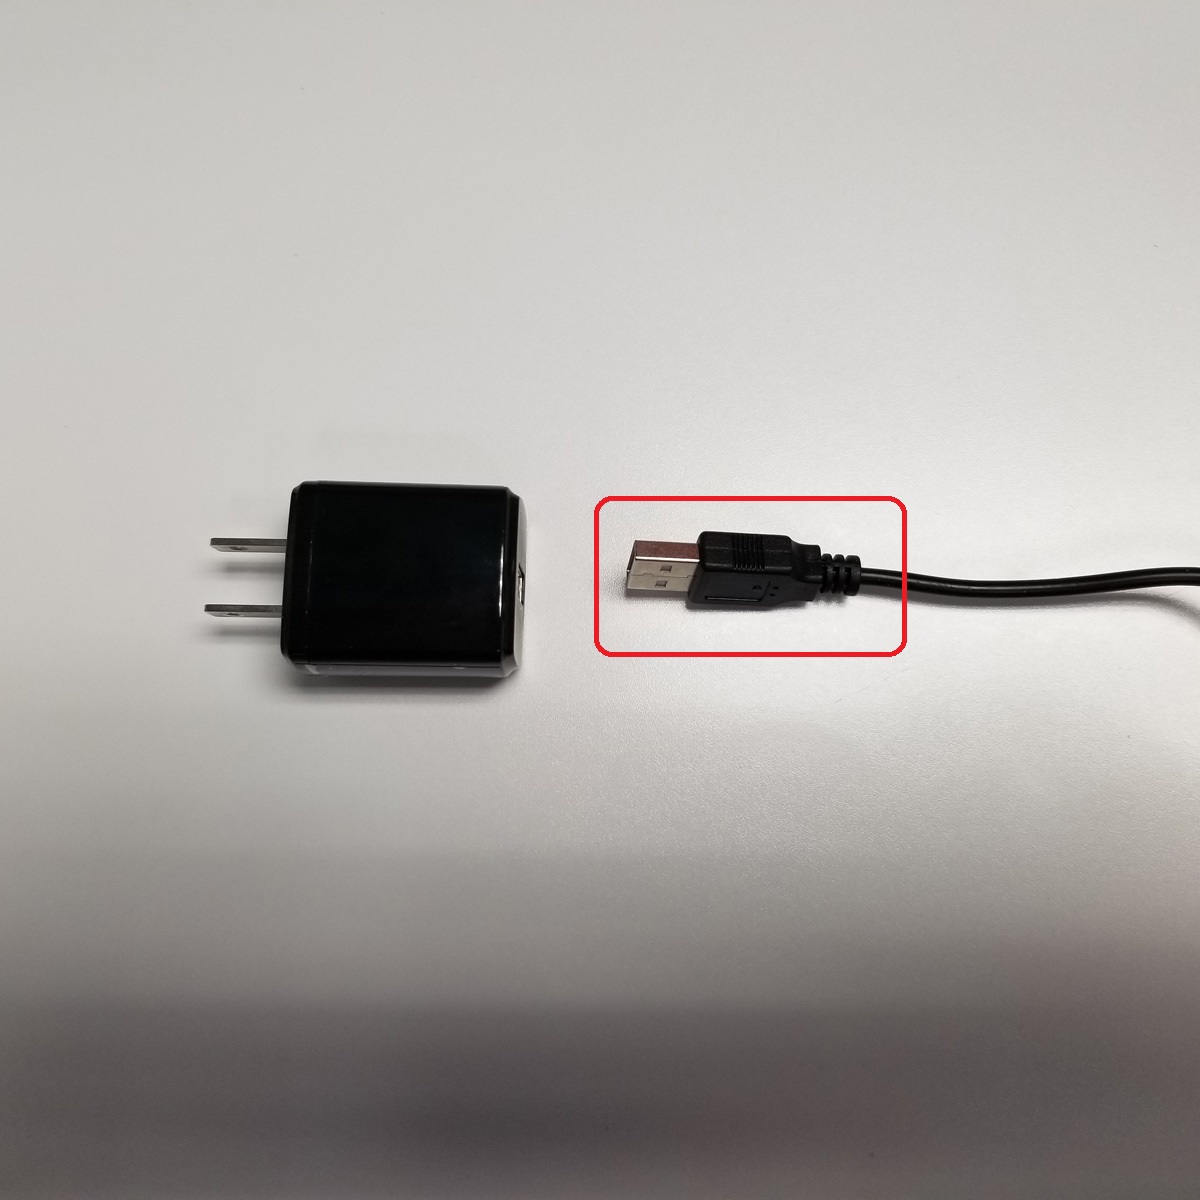
- Plug in the USB Cable directly into the TV USB Port
- Remove the USB Cable from the Power Adapter
- Power the Nano-PC with the included Power Adapter
- Plug in the Power Adapter into an available Electrical Outlet (or Surge Protector)
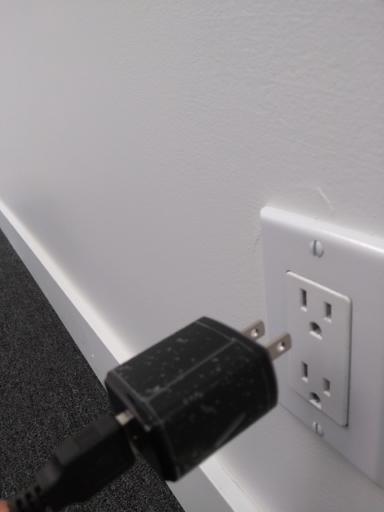
- Plug in the Power Adapter into an available Electrical Outlet (or Surge Protector)
- Power the Nano-PC with the TV USB Port (recommended)
...
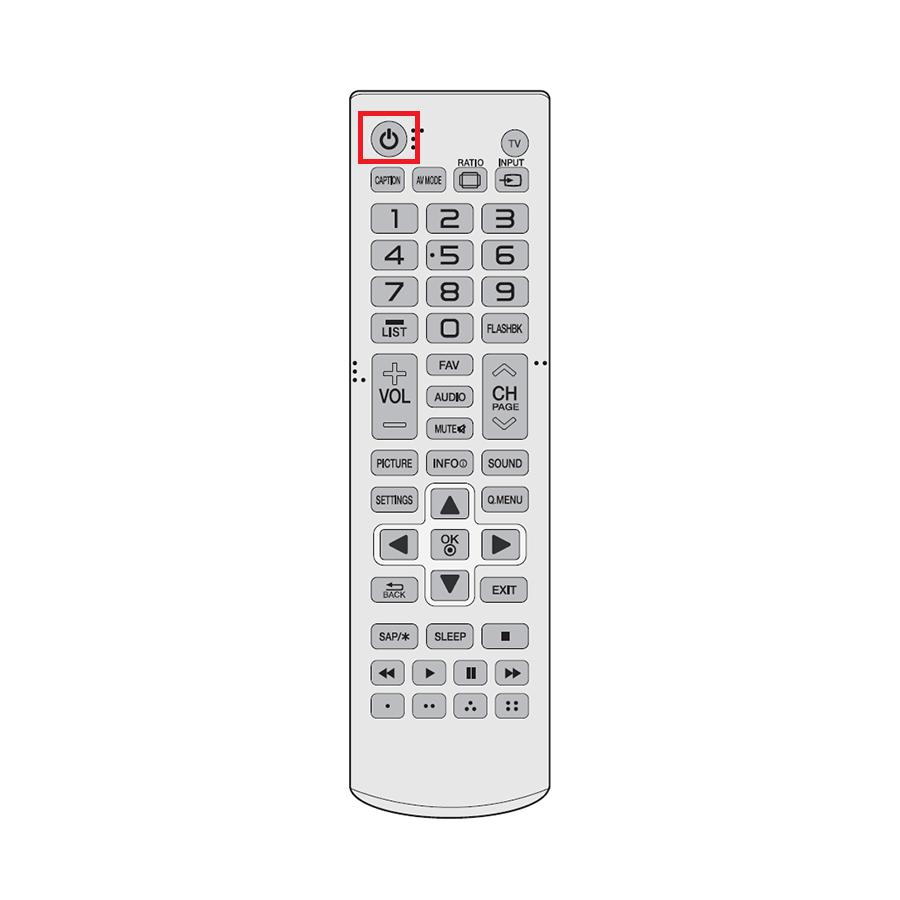
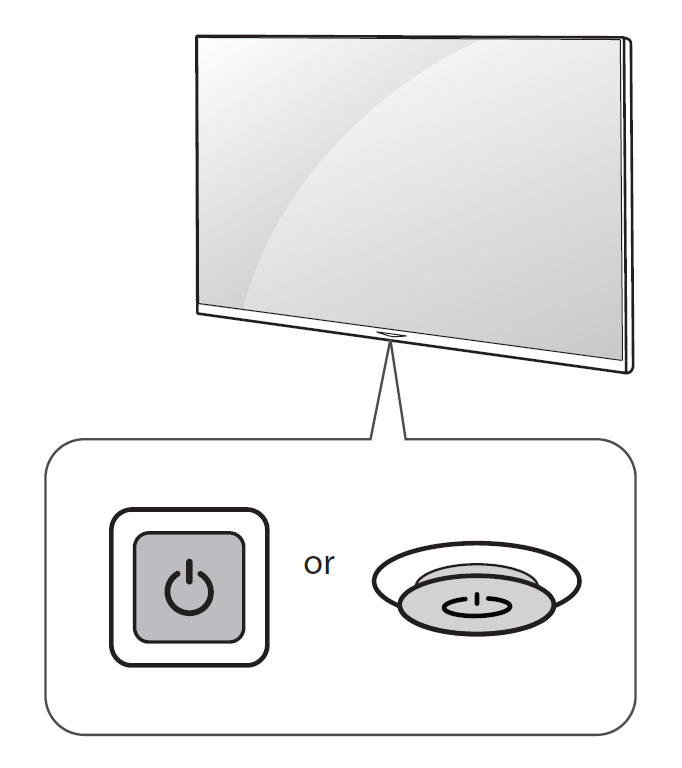
- Use either the Remote or the physical Power Button the TV (Remote and Power Button will vary depending on the TV model)
- Change the TV Input to the installed HDMI Port
Setup a Layout
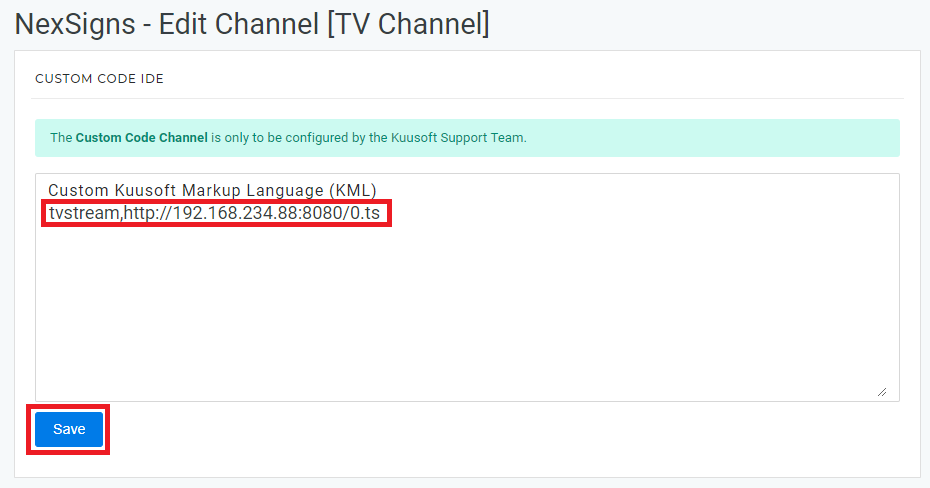
- Create a Custom Code Channel
Copy and Paste the following code into the Custom Kuusoft Markup Language (KML) Text Box and press Save
Code Block tvstream,http://192.168.234.88:8080/0.ts
- Create a Layout
- Create a Container and connect it to the previously created Custom Code Channel
- Press Publish to view the TV Streaming Input
...
| Filter by label (Content by label) | ||||||||||||||||||
|---|---|---|---|---|---|---|---|---|---|---|---|---|---|---|---|---|---|---|
|
...
| Page Properties | ||
|---|---|---|
| ||
|
...