These steps will help users configure the Wi-Fi Settings on a Nano-PC3 device using a USB Flash Drive.

This article is intended for Expert Users trying to complete large-scale setting updates on multiple devices.

For any standard Wireless Network setting updates - How to Configure the Wi-Fi Settings on a Nano-PC (USB Mouse)

Configuration requires a USB Flash Drive (not included).  Recommended settings for the USB Flash Drive:

  • File System
    • FAT32
  • Allocation Unit Size
    • Default Allocation Size
  • Capacity
    • 16GB or under

Here are additional Wireless Network Requirements.

Topics Covered

Configure the Setting File (setting.conf)

  1. Download the setting.conf file  (If the Kuusoft Support Team emailed you a pre-configured Setting File, skip to Step 3)


     File
  2. Open the setting.conf file with Notepad, NotePad++, TextEdit, or another Text Editor 

    Note that the Wi-Fi SSID and Password are both case-sensitive and space-sensitive


    1. Replace WiFiNetworkName with your Wi-Fi Network Name 
    2. Replace WiFiPassword with your Wi-Fi Password

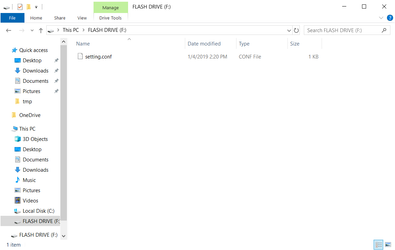
  3. Save the configured setting.conf file onto the root of the USB Flash Drive


Apply the Setting File

  1. Unplug the Power Cable from the DC-IN port of your Nano-PC3 (The Nano-PC3 can stay connected to your TV)


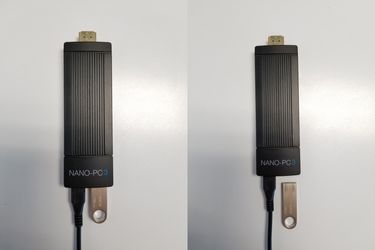
  2. Insert the USB Flash Drive into your Nano-PC3 (located on the bottom of the device)


  3. Plug in the Power Cable into the DC-IN port of your Nano-PC3


  4. The Nano-PC3 will update the Wi-Fi Settings and will automatically reboot your device.
  5. Wait until the Nano-PC3 is back online
  6. Remove the USB Flash Drive from your Nano-PC3 


  7. You are done!

Applies to

Nano-PC3

Related articles

Related articles appear here based on the labels you select. Click to edit the macro and add or change labels.

Related tickets

Copy and paste Jira related ticket link here from project "PRODUCT"


Related issues